
Traveling always gets me excited, but keeping my essentials organized can be a challenge. My passport is one of those things I want to keep safe, yet easily accessible. That’s when I realized—a handmade passport holder not only solves the problem but adds a personal touch to my travel gear.
Why Make Your Own Passport Holder?
Creating a custom passport holder combines practicality with creativity. A handmade holder offers a tailored solution for safeguarding your passport while reflecting your personal style. Unlike store-bought options, it can be designed to match individual needs, incorporating extra pockets for boarding passes or cards.
Making your own passport holder ensures durability through material choice. Using sturdy fabrics like canvas or vinyl guarantees protection against wear, spills, or unexpected travel mishaps. By sewing it yourself, I can reinforce stitches and customize the size for a snug fit.
It’s also an opportunity to express creativity. Adding touches like embroidery designs, patterned fabrics, or vibrant colors turns a functional item into something unique. Personal details, such as a monogram or a favorite symbol, make it distinctly yours.
Materials Needed For Sewing a Passport Holder
Creating a custom passport holder begins with gathering the right materials. Choosing durable fabrics, functional tools, and thoughtful extras enhances the final product’s practicality and style.
Fabric Options And Tools
Using sturdy materials ensures the passport holder lasts through multiple trips. I often select heavyweight cotton, canvas, or vinyl for the exterior since these fabrics resist wear and tear. For the interior lining, lightweight cotton or polyester complements the exterior while keeping the overall bulk manageable.


Basic sewing tools like fabric scissors, a rotary cutter, and a self-healing cutting mat simplify the cutting process. A sewing machine with a straight stitch setting handles most seams; however, a leather needle or walking foot may be necessary when working with thick or slippery materials. Don’t forget clips or pins to keep your layers in place during sewing.
Additional Supplies
A few simple supplies can refine the holder’s design. Fusible interfacing adds structure and stability to lighter fabrics, ensuring the holder retains its shape. A strong polyester thread secures the seams, with a neutral or matching color complementing your fabric choice.
Adding embellishments like a snap button, velcro, or small zipper ensures secure closure options for the holder. I suggest using a ruler and fabric chalk for precise measurements and markings. If a more decorative look appeals to you, consider embroidery thread, appliqués, or iron-on patches.


Steps To Sew Your Passport Holder
Creating a passport holder combines practicality and creative expression. Follow these straightforward steps for an organized and stylish design.
Cutting And Preparing The Fabric
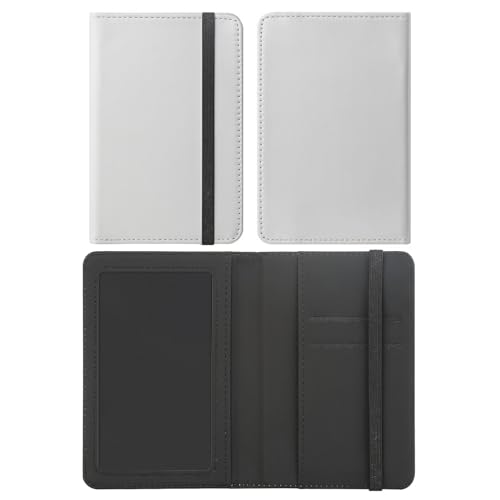
I always begin by cutting the fabric to the specified dimensions for the holder. For a standard passport, the exterior fabric measures 6.5 x 9.5 inches, and the same applies to the interior lining. I use a rotary cutter for clean, precise edges and ensure my pieces are even. To reinforce structure, I cut fusible interfacing slightly smaller than the fabric panels and iron it onto the wrong side of the fabrics. This step strengthens the holder and prevents it from being flimsy. If I’m including interior pockets, I cut two additional pieces at 6.5 x 5 inches and fold each in half lengthwise to create finished edges.
Assembling And Sewing The Pieces
I layer the fabrics carefully to ensure no misalignment during sewing. I place the two pocket pieces on top of the interior lining, aligning them along the side edges, wrong sides together. Then, I position the exterior fabric on top of this stack, right sides facing each other, and clip everything securely with sewing clips or pins. I sew along all four sides with a 1/4-inch seam allowance, leaving a small 2-inch gap at the bottom edge for turning. After stitching, I clip the corners diagonally to reduce bulk before flipping it right-side out through the gap.
Adding Final Touches
Once turned, I press the holder with care to achieve crisp edges. I topstitch around the entire holder, closing the gap while securing the seams. For closures, I attach a snap button, velcro, or elastic band, based on my functional preference. I often add embellishments such as embroidery, appliques, or decorative stitching to personalize the holder. If you’d like, you can use fabric paint or stamps to create unique designs directly on the fabric.
Tips For Personalizing Your Passport Holder
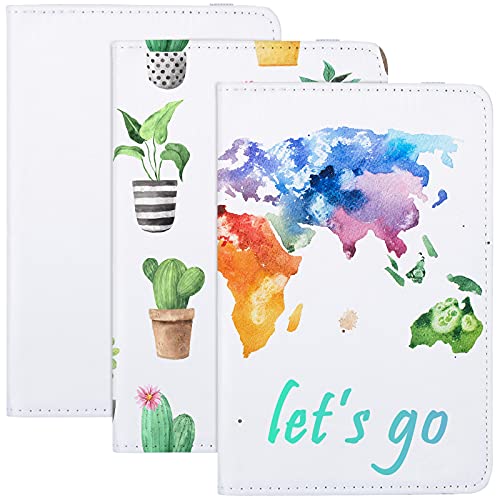
Choosing the right embellishments transforms a basic passport holder into a unique accessory. I recommend using embroidery, appliqués, or fabric stamps to reflect your personality. For example, you might stitch a small travel-related motif like a globe or a plane onto the front. These details enhance the design while keeping it meaningful.

Adding functional extras tailors the holder to your travel needs. I like to include extra pockets for cards, cash, or boarding passes. Using contrasting fabric for linings or pockets adds style and makes it easier to spot smaller items inside.
Incorporating closure options keeps your passport secure. Magnetic snaps, elastic bands, or button loops work well, depending on your preference. I prefer elastic because it’s flexible and easy to use, even when you’re in a rush.
Experimenting with fabric choices makes the holder truly stand out. Bold prints, textured materials, or even upcycled fabrics add character. I once repurposed a piece of denim from old jeans, giving it a rugged, unique look.
Stitching a label or monogram personalizes the piece even further. I’ve used both hand-embroidered initials and custom labels with meaningful quotes. These small touches make the holder feel distinctly yours.
Benefits Of A Handmade Passport Holder
A handmade passport holder offers durability and customization unmatched by store-bought options. By using quality materials like canvas, vinyl, or heavyweight cotton, I can create a holder that’s robust enough to endure frequent travel. Unlike mass-produced ones, a custom piece reflects my personal style while remaining functional.
« How to Make an Apron for Cooking: Easy DIY Guide to Save Money and Add Personal Style
How to Sew a Pet Bed for Cats or Dogs: Step-by-Step Guide to Crafting the Perfect Cozy Spot »
Crafting my own holder allows me to tailor it to my unique needs. Adding pockets for travel documents, cards, or cash keeps me organized and minimizes the risk of misplacing essentials. This customization ensures the holder meets practical requirements without sacrificing appearance.
A DIY passport holder reduces waste and supports sustainability. Repurposing leftover fabric or upcycling old materials transforms them into something useful. This eco-conscious crafting aligns with modern sustainability values while producing a one-of-a-kind piece.
Handmaking my holder gives me the opportunity to express creativity. Choosing colors, fabrics, and embellishments lets me design something that represents my personality and travel style. Whether I add embroidery, appliqués, or custom stitching, the result feels more personal and satisfying.
Creating my own passport holder can be cost-effective. Crafting supplies are often less expensive than purchasing a premium case, especially when using leftover fabric. This budget-friendly DIY approach combines practicality and artistry without breaking the bank.
Conclusion
Sewing a passport holder is more than just a practical project; it’s a chance to create something uniquely yours. With the right materials and a bit of creativity, you can craft a holder that’s both functional and stylish, perfectly suited to your travel needs.

Whether you’re adding personal touches or experimenting with bold designs, this DIY project lets you combine utility with self-expression. Plus, knowing you’ve made it yourself adds a little extra joy every time you reach for your passport.
So grab your supplies, let your creativity flow, and enjoy the process of making a travel essential that’s as unique as your adventures.


