
Christmas always feels a little more magical when there’s a countdown to look forward to, doesn’t it? Advent calendars have a way of building that excitement day by day, but there’s something extra special about creating one yourself. A handmade fabric advent calendar isn’t just festive—it’s personal, reusable, and filled with charm.
I love how this project combines creativity with the joy of the season. Whether you’re a seasoned crafter or just looking for a fun holiday DIY, making your own fabric advent calendar is easier than you might think. Plus, it’s a wonderful way to add a personal touch to your holiday traditions.
Benefits Of Making A Fabric Advent Calendar
Creating a fabric advent calendar offers creative expression and customization. You can choose fabrics, colors, and designs that match your holiday theme or personal style. Adding appliqué, embroidery, or other embellishments enhances the uniqueness of the calendar.
A fabric advent calendar provides a reusable and eco-friendly alternative. Unlike disposable paper or plastic versions, fabric calendars last for years, reducing waste and supporting sustainable traditions.
Adding personal elements creates meaningful connections. Sewing individual pockets or compartments lets you fill them with personal tokens like hand-written notes, small trinkets, or even handmade ornaments, making each day’s reveal special.
This calendar encourages crafting skills development. Constructing it allows practice in sewing techniques, precision cutting, and design planning, which are enjoyable for beginners and experienced crafters alike.


Materials Needed
Creating a fabric advent calendar involves choosing the right materials for durability and aesthetic appeal. Here’s a breakdown of what you’ll require to complete this holiday project.
Fabric Options
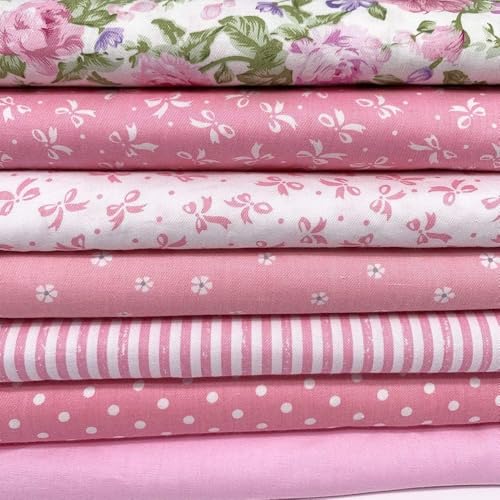
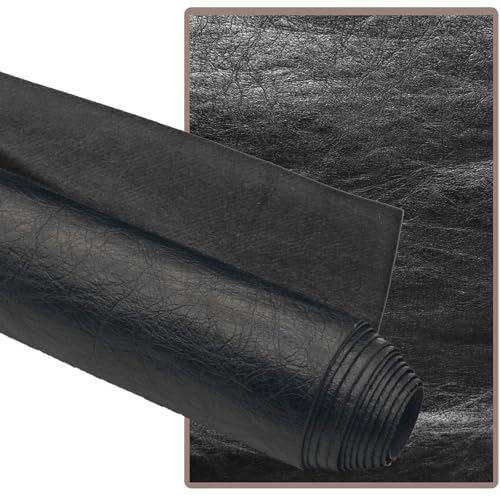
Use sturdy fabrics like cotton, linen, or felt to ensure longevity. Cotton works well for detailed designs and easy stitching, while felt provides structure without fraying. For a festive look, pick holiday-themed patterns or solid colors—red, green, and gold are popular choices. Mix textures, such as pairing smooth cotton with textured burlap, to add visual interest. Ensure fabric pieces are pre-washed to prevent shrinkage after assembly.
Tools And Supplies
Prepare essential tools for precision and ease. Fabric scissors or rotary cutters are ideal for clean cuts, especially on intricate designs. Use fabric markers or tailor’s chalk for marking measurements. Pins or clips secure pieces during assembly. A sewing machine speeds up stitching, though hand-stitching works too for decorative details.


Include threads, preferably polyester or cotton, to match or contrast with the fabric. Use embroidery floss for embellishments like numbers or decorative stitches. Rulers or measuring tapes help maintain accurate dimensions. An iron is crucial for pressing seams and ensuring a neat finish. For hanging the calendar, include dowels, string, or ribbons.
Step-By-Step Guide To Making A Fabric Advent Calendar
Creating a fabric advent calendar combines sewing, crafting, and holiday cheer into one rewarding project. Follow these steps to design and assemble your own reusable calendar.
Designing The Layout
I start by deciding on the overall size and shape of the calendar. Common options include a square, rectangular, or tree-shaped design. Once I select a base fabric, like cotton or felt, I measure and mark the dimensions to ensure it’s both manageable and fits my desired number of pockets.
I plan the pocket arrangement, spacing them evenly across the surface. For a crisp design, I use a ruler and fabric chalk to mark lines for pocket placement. If added embellishments, like embroidery or applique, are part of the plan, I determine their positions before sewing.
Cutting And Sewing Pockets
To make the pockets, I cut rectangles from the chosen fabric. I ensure each piece is large enough to hold small items or notes. For 24 pockets, I aim for consistent sizes, cutting each to precise measurements.

Before attaching them, I hem the top edge of each pocket to prevent fraying. Using a sewing machine or hand-stitching, I secure hems with straight or decorative stitches. For durability, I double-stitch the pocket sides and bottom when sewing them to the base.
Assembling The Calendar
After prepping the base and pockets, I pin each pocket into place following my marked layout. Then I sew around the pocket edges, leaving the top open for filling. I work row by row, checking alignment regularly to maintain an even appearance.
Once all pockets are attached, I add a top sleeve or loops using matching fabric to allow the calendar to hang on a dowel or rod. This step ensures it can be displayed securely on a wall or door.
Adding Decorative Details
For a festive touch, I use embellishments like embroidery, buttons, or fabric paint. Adding numbers to each pocket is essential; I stitch, stencil, or use iron-on numbers for clarity. Holiday-themed ribbons, trims, or appliques enhance the design and add personality.
I include intricate touches like hand-stitched snowflakes or metallic thread accents to elevate the look further. Final adjustments, like cleaning up loose threads or steaming wrinkles, ensure a polished and professional finish.
Creative Ideas For Filling Your Advent Calendar
« Master Sewing Potholders: A Quick Project Perfect for Beginners & Gift Ideas
Master Sewing a Kimono Jacket: A Stylish Guide to Craft Your Own Wardrobe Essential »
Choosing creative and meaningful items makes your fabric advent calendar extra special. Thoughtful additions bring joy to each day while complementing the handmade charm of your calendar.
Personalized Notes
I enjoy adding personalized notes to my advent calendar pockets. These can include heartfelt messages, holiday memories, or fun challenges for the recipient. For example, one note could invite them to bake cookies together, while another might share a cherished family tradition. Writing these on festive paper enhances their presentation. I often decorate the notes with small illustrations or stamps to make them feel even more unique.
Small Gifts And Surprises
I like including small, thoughtful surprises that reflect individual preferences. Items such as mini sewing kits, skeins of embroidery thread, or novelty buttons work perfectly for craft enthusiasts. For children, small toys like figurines or puzzles create excitement. I also opt for consumable treats—such as wrapped chocolates, tea sachets, or handmade candles—which fit well into the pockets without overwhelming their size. When choosing, I ensure the gifts are varied to keep the experience fresh throughout the countdown.
Tips For A Long-Lasting Advent Calendar
Choose Durable Fabrics
I always recommend using high-quality fabrics like cotton, linen, or felt. These materials resist wear and tear, even with yearly use. Pre-washing the fabric helps prevent shrinkage and preserves the calendar’s shape over time.
Reinforce Pocket Seams
Strong pocket seams ensure repeated use doesn’t cause rips. Double stitching or using a stronger thread, such as polyester, adds durability. For example, a zigzag stitch along the edges prevents fraying.

Avoid Overloading Pockets
Lightweight items prolong the fabric’s lifespan. Heavy objects could stretch or distort pockets. Opt for small, lightweight surprises, like chocolates, notes, or miniature decorations.
Protect Embellishments
Attaching decorative elements securely prevents them from falling off over time. I sew embellishments like buttons or appliqués rather than using glue. This method keeps them firmly fixed, even after frequent handling.
Store Properly After Holidays
Fold the calendar carefully and store it in a dry, cool area. Avoid direct sunlight or damp places, which can cause fabric discoloration or mildew. Using an airtight container offers extra protection.
Use Fade-Resistant Materials
Fabrics and threads that resist fading keep the advent calendar vibrant for years. For instance, consider high-quality dyes or pre-dyed materials specifically labeled as fade-resistant.
Refresh Annually
Small touch-ups maintain the calendar’s charm. Check for loose seams or faded numbers at the end of each season. Simple repairs ensure it remains visually appealing and functional year after year.

Conclusion
Making a fabric advent calendar is such a rewarding and festive project. It’s not just about crafting something beautiful but also creating a piece that carries meaning and memories year after year. The care and thought you put into it will shine through, making it a cherished part of your holiday traditions.
Whether you’re a seasoned crafter or just starting out, this project offers the perfect mix of creativity and practicality. Plus, it’s a wonderful way to bring a little extra magic to the countdown to Christmas. I hope you enjoy every step of the process and the joy it brings to your holiday season!