There’s something timeless about a slip dress—it’s simple, elegant, and effortlessly chic. Whether you’re dressing it up for a night out or keeping it casual for a sunny day, it’s a wardrobe staple that never goes out of style. The best part? You don’t have to rely on store-bought options. Sewing your own slip dress is easier than you might think, and it lets you create something truly unique.
I’ve always loved how a handmade piece feels more personal, and a slip dress is the perfect project to combine style with simplicity. With just a few materials and some basic sewing skills, you can craft a dress that fits you perfectly and reflects your personality. Plus, there’s something so satisfying about wearing something you’ve made yourself! Let’s dive into the process and bring your dream slip dress to life.
Choosing the Right Fabric for Your Slip Dress
Selecting the best fabric makes all the difference in crafting a slip dress that’s both stylish and comfortable. The right choice enhances the dress’s elegance and ensures ease of sewing.
Recommended Fabrics for a Fashionable Look
I prefer lightweight fabrics with a soft drape for slip dresses, as they create a smooth, flowing appearance. Satin, charmeuse, and silk are ideal materials for an elegant look. These fabrics have a luxurious sheen, perfect for evening wear or special occasions.
For casual slip dresses, fabrics like rayon or lightweight cotton work well. They’re breathable, easy to work with, and provide a comfortable finish. Stretch fabrics, such as jersey knit, can be another option if you’re looking for a more relaxed fit.
Always consider the fabric’s texture when selecting. Smooth fabrics complement the slip dress’s clean lines, while sheer fabrics may need lining to maintain modesty.
How to Measure and Cut Your Fabric
Measuring accurately ensures a proper fit. I always recommend using a flexible tape measure to take body measurements, including bust, waist, and hips. Compare these to your sewing pattern and add seam allowances before cutting.
Use pattern weights or pins to secure the fabric in place for precise cutting. It’s especially helpful with slippery materials like satin or silk. A rotary cutter can provide clean edges in these cases.
Lay the fabric flat on a cutting surface, ensuring there are no creases. Place your pattern pieces following the fabric’s grainline markings; this prevents the dress from stretching unevenly after sewing.
Essential Tools and Materials
Sewing a slip dress requires specific tools and materials to ensure smooth progress and polished results. Having the right essentials from the start makes the process efficient and enjoyable.
Sewing Machine and Accessories
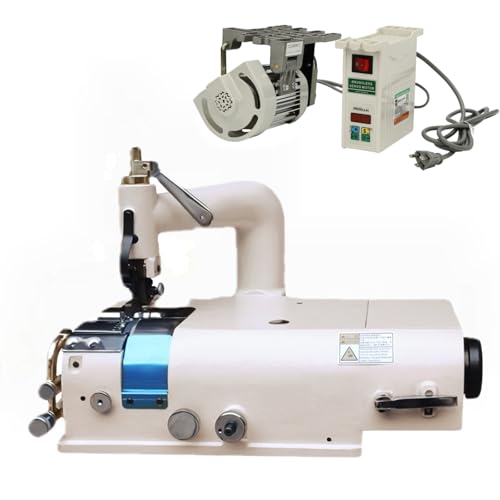
I always rely on a reliable sewing machine for neat and consistent stitches. A machine capable of handling delicate fabrics like silk or satin is ideal. Attachments such as a zigzag foot or walking foot prevent fabric slippage during sewing.
Sharp sewing scissors or a rotary cutter are essential for precise fabric cutting. I keep a set of fine glass-head pins for securing lightweight materials and avoid damaging delicate surfaces. Seam rippers, fabric marking tools, and a pressing tool or iron ensure clean edges and corrections when needed.
Patterns and Templates
Accurate patterns streamline the dress construction process. I prefer slip dress patterns designed for drapey fabrics, ensuring the final piece maintains the desired flow and fit. Printable templates or professionally drafted patterns are both great choices.
For cutting accuracy, I use pattern weights instead of pins, especially with slippery materials. Clear marking of seam allowances and cutting lines on the pattern simplifies assembly and reduces mistakes.

Step-By-Step Guide to Sewing a Slip Dress
Crafting a slip dress combines simplicity with elegance. Follow these steps for a polished and professional result.
Preparing the Fabric
I always pre-wash the fabric to prevent shrinking later. After washing and drying, I press the fabric with a cool iron to remove wrinkles, especially for satin or silk. For slippery fabrics, I like to use a rotary cutter and pattern weights to ensure clean and accurate cuts. Laying the fabric flat on a cutting mat minimizes movement.
Once the pattern is pinned or weighted down, I trace it using a fabric marking tool, ensuring I include seam allowances. If the fabric is sheer, I prepare a lining layer by cutting the same shapes from a complementary fabric.
Creating the Seams and Hems
I start by sewing the side seams with a straight stitch, matching raw edges precisely. For delicate fabrics like charmeuse, I use a French seam to encase raw edges and give a clean finish. If I’m working with rayon, I overlock the edges using a serger or zigzag stitch to prevent fraying.
For the hem, I narrow hem by folding the fabric edge twice and stitching it down carefully to maintain a smooth finish. On satin, I adjust my sewing machine’s tension and opt for a finer needle to avoid puckering.
Adding Straps and Finishing Touches
« How to Sew a Fabric Journal Cover That’s Stylish, Durable, and Uniquely Yours
How to Sew a Tank Top in 30 Minutes: Quick, Easy, and Stylish DIY Guide »
I cut bias strips from the fabric or use ready-made spaghetti straps. Turning and sewing bias strips for straps ensures durability and elegance. I attach the straps by pinning them to the bodice section in a V-shape or standard placement, ensuring symmetry using my measuring tape.
For the finishing touches, I press every seam and hem with a warm iron, using a pressing cloth for satin or silk to prevent shine marks. Adding details like lace trim or small decorative stitches at the neckline can elevate the design. I inspect the entire dress to confirm it drapes well and has no loose threads or uneven finishes.
Tips for a Professional Finish
Creating a polished slip dress involves attention to detail and the right techniques. Focusing on precision ensures your final piece looks elegant and well-crafted.
Techniques for Neat Stitching
Maintaining consistent tension prevents puckering, especially on delicate fabrics like satin or silk. I adjust my sewing machine settings to match the fabric weight, opting for shorter stitch lengths around 2.0-2.5 mm for finer results. Using a new, sharp needle, such as a Microtex size 70/10, avoids skipped stitches.
Finishing edges is essential to prevent fraying. For lightweight fabrics, I choose French seams or use a serger to create clean, durable seams. When pressing seams, I use a pressing cloth to avoid shiny marks on the fabric.

Adjustments for the Perfect Fit
A tailored fit makes a slip dress comfortable and flattering. After assembling a basic version of the dress, I pin the side seams while wearing it inside out to mark adjustments. For bust darts, I carefully realign the dart points to follow the natural curve without creating puckers.
Hemline adjustments require standing in front of a mirror or enlisting help to ensure even length all around. To finish the hem, I use a narrow hem technique for lightweight materials, folding the edge twice before stitching to keep it tidy and secure.
Benefits of Sewing Your Own Slip Dress
Crafting your own slip dress combines creativity and practicality, offering unique advantages that store-bought options can’t match. It transforms a simple garment into a refined, personalized piece.
Cost-Effectiveness and Personalization
Sewing a slip dress is often more affordable than purchasing one, especially for high-quality materials. Fabric like satin or charmeuse, bought on sale or in smaller quantities, allows for substantial savings. By choosing your own material, color, and texture, you create a dress tailored to your preferences, which retail versions rarely achieve. Adding customizations like lace trim or embroidered details enhances its uniqueness, making it a one-of-a-kind piece.
Enhancing Your Sewing Skills
Creating a slip dress sharpens fundamental sewing techniques. Working with slippery fabrics like silk or rayon improves precision and control, while tackling finishes such as French seams or rolled hems refines stitch quality. Adjustable straps or bias-cut pieces challenge and expand your abilities, helping you grow as a sewist. Each project builds confidence, preparing you to take on more complex patterns with ease.

Conclusion
Sewing a slip dress is such a rewarding experience. It’s a chance to create something that’s uniquely yours while honing your sewing skills. From selecting the perfect fabric to adding those final touches, every step brings a sense of accomplishment.
There’s nothing quite like wearing a piece you’ve made with your own hands. It’s not just about the dress itself but the creativity and care that went into making it. Whether you’re crafting for elegance or a casual vibe, the process is as enjoyable as the result.
So grab your materials, trust the process, and let your creativity shine. You’ll not only have a beautiful slip dress but also the pride of knowing it’s one of a kind. Happy sewing!


