I’ve always been captivated by the beauty of embroidery, but discovering machine embroidery truly transformed my creative journey. There’s something magical about seeing intricate designs come to life with just a push of a button.
Machine embroidery combines traditional stitching with modern technology, making it easier than ever to create detailed and vibrant patterns. Whether you’re a seasoned crafter or just starting out, understanding the basics can open up endless possibilities for your projects.
In this guide, I’ll walk you through everything you need to know to get started with machine embroidery. From choosing the right equipment to mastering essential techniques, you’ll gain the confidence to bring your creative ideas to life.
Understanding Machine Embroidery
Machine embroidery combines precision and creativity, allowing intricate designs to be replicated effortlessly. Unlike hand embroidery, machine embroidery uses automated stitching, increasing speed and consistency. This technology integrates computer software, which translates digital designs into stitch patterns that the machine executes accurately.
Key components of machine embroidery include the embroidery machine, stabilizers, and digital design files. Modern embroidery machines offer multiple hoop sizes, varying stitch options, and built-in designs, catering to diverse crafting needs. Stabilizers hold the fabric in place, ensuring clean, professional results by preventing distortion during stitching.
Digital design files come in formats like DST, PES, and JEF, each compatible with specific machines and software. Users can create custom designs or choose from extensive libraries, enabling personalization and versatility. Understanding these elements is crucial for setting up your workspace and selecting the right tools for your projects.


Maintenance ensures the longevity and performance of your embroidery machine. Regular cleaning removes lint and debris, while timely needle replacements prevent damage to fabrics and designs. Proper calibration aligns the machine’s components, maintaining precision in every stitch.
By mastering the fundamentals of machine embroidery, you can explore endless creative possibilities. From monograms to elaborate patterns, machine embroidery transforms simple fabrics into stunning works of art with efficiency and ease.
Essential Tools And Equipment
Starting your machine embroidery journey requires the right tools. Here’s what you’ll need to get started.


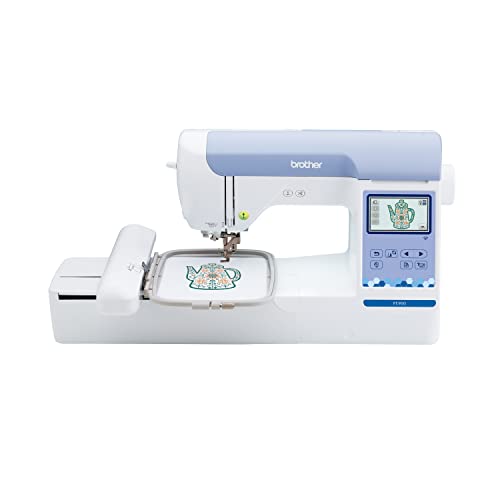
Choosing The Right Embroidery Machine
Selecting an embroidery machine depends on your skill level and project needs. Entry-level machines offer basic features suitable for beginners. Advanced models include multiple hoop sizes, built-in designs, and automatic thread cutters. Consider factors like stitch quality, speed, and ease of use. Brands like Brother, Janome, and Singer provide reliable options. Evaluate your budget and ensure the machine supports the types of projects you plan to undertake.
Selecting Threads And Fabrics
Choosing the appropriate threads and fabrics enhances your embroidery quality. Polyester threads offer durability and vibrant colors, ideal for most projects. Rayon threads provide a shiny finish, perfect for decorative pieces. For fabrics, cotton serves as a versatile base for various designs. Stabilizers like tear-away or cut-away support fabric during stitching. Ensure thread and fabric compatibility to prevent puckering and ensure smooth embroidery.
Basic Techniques For Beginners
Starting with the right techniques sets the foundation for successful machine embroidery projects. Here’s how to get started effectively.
Setting Up Your First Project
Begin by selecting a simple design that matches your skill level. Choose a fabric size that fits your embroidery machine’s hoop, typically 4×4 inches for beginners. Prepare your workspace by organizing your materials, including fabric, stabilizer, and threads. Ensure your machine is properly calibrated by following the manufacturer’s instructions. If you encounter issues, refer to the user manual or contact customer support for troubleshooting.
Mastering Stitch Types
Understanding different stitch types enhances your embroidery quality. Satin stitches create smooth, glossy lines ideal for outlines and lettering. Fill stitches cover larger areas with dense stitching, perfect for backgrounds and intricate patterns. Running stitches produce dashed lines suitable for delicate details and shading. Combining these stitch types allows for versatile and professional-looking designs. Practice each stitch type on a scrap fabric to gain confidence before applying them to your main project.

Designing And Customizing Patterns
Designing and customizing patterns are essential steps in creating unique machine embroidery projects. I use specialized software like Adobe Illustrator or dedicated embroidery programs such as Wilcom and Embird to craft precise designs. These tools allow me to draw shapes, add text, and manipulate elements with ease.
Customizing existing patterns involves several key actions:
- Modifying Colors: I adjust thread colors in the software to match my project’s palette, ensuring harmony and contrast where needed.
- Resizing Elements: Scaling designs to fit different fabric sizes requires accurate measurements, typically using the software’s scaling feature.
- Combining Motifs: Merging multiple patterns creates complex and personalized designs, enhancing the overall aesthetic of the embroidery.
Creating my own patterns starts with sketching ideas on paper, then digitizing them using a scanner or drawing directly within the embroidery software. This process includes:
- Tracing the Sketch: I import the scanned image and use tracing tools to outline the design digitally.
- Defining Stitch Types: Selecting appropriate stitch types like satin, fill, or running stitches ensures each part of the design is embroidered correctly.
- Layering Elements: Organizing different components in layers helps manage intricate details and overlapping parts effectively.
Color selection is crucial for achieving the desired look. I choose thread colors based on factors like fabric type, lighting, and the project’s theme. Here’s a quick reference table for common thread types and their best uses:
| Thread Type | Best For | Characteristics |
|---|---|---|
| Polyester | Durable, everyday projects | Versatile, colorfast |
| Rayon | Shiny finishes | Lustrous, smooth texture |
| Cotton | Natural, breathable designs | Soft, flexible |
Sizing and scaling designs accurately prevent distortion during embroidery. I measure the fabric area and adjust the design dimensions accordingly within the software. Ensuring the design fits the intended space avoids excessive stretching or shrinking of the stitches.
« “You Won’t Believe How Adding Ease to Patterns: When and How Transforms Your Projects!”
Start Your Sewing Journey: First Project – How to Make a Drawstring Bag »
Saving and transferring designs to the embroidery machine requires compatible file formats like .DST, .PES, or .EXP. I export the finalized pattern from the software and transfer it via USB, SD card, or direct connection, depending on the machine’s capabilities. This step ensures the machine interprets the design correctly for flawless stitching.
By mastering the design and customization process, I enhance the uniqueness of each embroidery project, transforming creative ideas into tangible, embroidered art.
Maintaining Your Embroidery Machine
Proper maintenance ensures my embroidery machine performs optimally and lasts longer. I follow these essential steps to keep my machine in top shape.
Regular Cleaning
I clean the machine after each use to prevent thread buildup and lint accumulation. Removing debris from the needle area and bobbin case reduces the risk of jams and maintains stitch quality. Using a soft brush, I gently sweep away leftover threads and dust.
Lubrication
Lubricating moving parts is crucial for smooth operation. I apply a few drops of machine oil to the designated areas as per the manufacturer’s instructions. This practice minimizes friction, prevents wear, and keeps the machine running quietly.

Proper Storage
Storing the machine in a dry, dust-free environment protects it from moisture and contaminants. I cover the machine with a breathable cloth to avoid dust accumulation while allowing air circulation. Keeping it away from direct sunlight prevents damage to plastic and metal components.
Calibration and Adjustments
Regular calibration ensures accurate stitching. I check the tension settings and adjust them if necessary to maintain consistent thread flow. Aligning the needle and bobbin correctly prevents skipped stitches and uneven patterns. Running a test stitch on scrap fabric helps verify the settings.
Replacing Parts
Worn-out parts can affect performance. I monitor the condition of needles, bobbins, and other components, replacing them when signs of wear appear. Using genuine replacement parts guarantees compatibility and maintains the machine’s reliability.
Troubleshooting Common Issues
Encountering issues like thread breaks or skipped stitches is inevitable. I refer to the troubleshooting section in the manual to identify and fix problems promptly. Resetting the machine and rethreading often resolve minor glitches, ensuring uninterrupted embroidery sessions.
Software Updates
Updating the machine’s software keeps it compatible with new designs and features. I check the manufacturer’s website regularly for updates and install them following the provided guidelines. This step enhances functionality and improves overall performance.

By adhering to these maintenance practices, I ensure my embroidery machine remains efficient and ready for creative projects.
Conclusion
Embarking on a machine embroidery journey has been incredibly rewarding for me. Seeing simple threads transform into beautiful designs is truly magical.
I encourage you to take the first step and explore the endless possibilities that machine embroidery offers. With the right tools and a bit of practice you’ll be creating stunning projects in no time.
Remember to enjoy the process and let your creativity shine. Happy stitching!