I absolutely love adding those elegant scalloped edges to my sewing projects. There’s something so charming and timeless about them. Sewing by hand might seem daunting at first, but with a little patience and guidance, you can master this lovely technique.
In this guide, I’ll walk you through the steps to create a perfect scalloped edge by hand. Whether you’re a beginner or looking to refine your skills, you’ll find tips and tricks to make the process easier and your projects more beautiful.
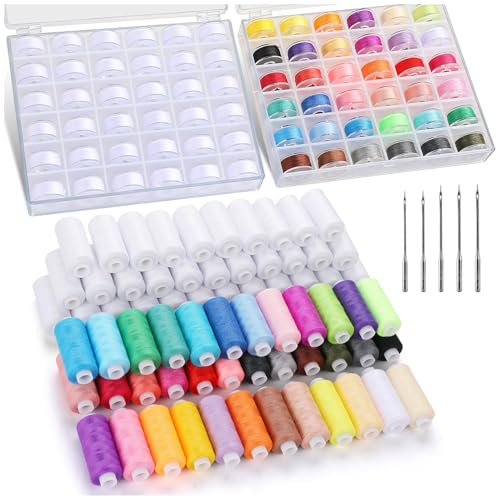
Materials Needed
To sew a scalloped edge by hand, I use the following materials:
- Fabric: Choose your project fabric. I work with cotton, linen, or lightweight wool for consistent scallop shapes.
- Thread: Select a thread that matches or complements your fabric color. I prefer polyester or cotton threads for durability and ease.
- Needle: Use a sharp hand-sewing needle appropriate for your fabric type, such as a size 7 or 8.
- Scissors: Keep a pair of fabric scissors handy for precise cutting.
- Pins: Straight pins hold the fabric in place as you stitch.
- Pattern or Template: Create or print a scalloped edge template to guide your stitching accurately.
- Measuring Tools: A ruler or measuring tape helps maintain even scallop spacing and size.
- Marking Tools: Fabric chalk or a washable fabric marker outlines your scallop pattern clearly.
- Thimble: Protects my finger during repetitive stitching.
- Seam Ripper: Essential for correcting any stitching mistakes efficiently.
Preparing Your Fabric
Preparing your fabric correctly sets the foundation for flawless scalloped edges. I follow these steps to ensure precision and consistency.
Measuring and Marking
I start by measuring the fabric’s edge using a 12-inch ruler. For each scallop, I mark a point every 2 inches with tailor’s chalk. Ensuring equal spacing is crucial for uniform scallops. I use a scalloped edge template to draw smooth curves connecting the marks, maintaining symmetry across the entire edge.
Cutting the Fabric
Using sharp fabric scissors, I carefully cut along the marked scallop lines. Precise cutting prevents jagged edges and ensures the curves match the template. I trim any excess fabric beyond the scallops, leaving a ¼-inch seam allowance. Double-checking each cut against the template helps achieve consistent shapes and a professional finish.


Sewing the Scalloped Edge
Sewing a scalloped edge adds a delicate touch to any project. Here’s how I achieve smooth, consistent scallops by hand.
Choosing the Right Stitch
Selecting the appropriate stitch ensures durability and a neat finish. I prefer the backstitch for its strength and precision. Use a stitch length of 4-5 mm to maintain uniformity. For finer projects, a running stitch with smaller spacing works well. Always match your thread to the fabric color to keep the edge seamless.
Sewing Technique
Starting at the curve’s peak, I guide the fabric gently to follow the scalloped line. I use my fingernail to help pivot the fabric smoothly at each curve. Maintain consistent tension to prevent puckering. Sew slowly, placing small, even stitches along the marked path. If needed, use a thimble for added control and comfort. After completing each scallop, tie a secure knot to finish the seam neatly.


Tips and Techniques
Enhancing your scalloped edge requires attention to detail and the right techniques. Here are key strategies to achieve flawless results.
Maintaining Even Curves
Achieving consistent curves ensures a professional look. I measure each scallop carefully, marking points every 2 inches using tailor’s chalk. I use a scalloped edge template to draw smooth, uniform curves connecting these marks. By starting each stitch at the peak of the curve and guiding the fabric steadily, I maintain even spacing. Holding the fabric taut without stretching prevents distortion, and using a ruler can help check the symmetry of each scallop. These methods guarantee balanced and aesthetically pleasing edges.
Securing the Thread
Properly securing the thread prevents unraveling and maintains the integrity of the scalloped edge. I begin by tying a secure knot at the start of each scallop, ensuring it lies flat against the fabric. After completing each curve, I backstitch briefly to reinforce the knot. I trim any excess thread close to the knot to avoid bulkiness. Consistently securing the thread after every scallop provides durability and a neat appearance, making your hand-sewn edges last longer.
Common Mistakes to Avoid
- Inconsistent Scallop Size
I often notice scallops that vary in size, making the edge look uneven. Ensure each scallop measures accurately by marking points precisely every 2 inches with tailor’s chalk.
- Uneven Tension
Maintaining consistent thread tension prevents puckering. I keep the tension steady as I sew to achieve a smooth, professional finish.

- Incorrect Stitch Choice
Choosing the wrong stitch affects durability and appearance. I prefer using a backstitch for strength or a running stitch for finer projects to support the scalloped edge.
- Poor Cutting Accuracy
Cutting too close or too far from the marked line results in uneven edges or fabric waste. I use sharp scissors and follow the marked lines carefully, leaving the appropriate seam allowance.
- Insufficient Thread Reinforcement
Skipping secure knots can cause the thread to unravel. I always tie knots at the beginning and end of each scallop and backstitch briefly for added reinforcement.
- Neglecting Fabric Preparation
Failing to measure and mark accurately leads to distorted scallops. I take the time to measure the fabric edge and mark points carefully before drawing the scalloped line.
- Rushing the Sewing Process
Sewing too quickly can result in missed stitches and uneven curves. I sew slowly and deliberately, focusing on guiding the fabric smoothly along the scalloped line.
- Using Dull Needles or Scissors
« How to Sew a Ruffle: Expert Techniques and Tips You Need to Master Now
Unlock the Secrets: How to Sew a Bar Tack for Reinforcement Like a Pro »
Dull tools make sewing and cutting difficult, leading to frayed edges and inconsistent stitches. I always use sharp needles and scissors to ensure clean lines and precise sewing.
- Ignoring Seam Allowance
Not leaving the correct seam allowance can compromise the edge’s stability. I consistently leave a ¼-inch seam allowance to maintain the scalloped edge’s structure and appearance.
- Skipping Final Touches
Forgetting to press or trim excess threads can detract from the finished look. I press the scalloped edge neatly and trim any loose threads to complete the professional finish.
Final Touches
After finishing the scalloped edge, I inspect my work for any uneven stitches or loose threads. If I spot inconsistencies, I carefully re-sew those areas to ensure a smooth finish. Trimming excess thread close to the fabric keeps the edge clean and prevents snagging.
Pressing the scalloped edge with an iron sets the stitches and smooths the fabric, enhancing the professional look. I use a low heat setting to avoid damaging the material, pressing from the underside for the best results.

Removing any remaining pins gently helps maintain the fabric’s integrity. If needed, I reinforce the edge by topstitching slightly inside the scallops, adding durability and a polished appearance. Finally, I give the entire piece a final press to ensure all elements lie flat and the scalloped edge stands out beautifully.
| Step | Action |
|---|---|
| Inspect | Check for uneven stitches or loose threads |
| Trim Threads | Cut excess thread close to the fabric |
| Press Edge | Iron the scalloped edge on low heat |
| Remove Pins | Gently take out any remaining pins |
| Reinforce (Optional) | Topstitch inside scallops for durability |
| Final Press | Smooth the entire piece for a polished look |
By following these final touches, my scalloped edges always achieve a neat and professional finish.
Conclusion
Seeing those perfect scalloped edges on my projects always brings a smile to my face. It’s amazing how a simple detail can transform a piece from ordinary to charming. Hand sewing each curve becomes a meditative process, allowing me to connect deeply with my work.
I love how scalloped edges add that timeless touch to any fabric. Whether you’re a beginner or seasoned sewer, taking the time to master this technique pays off in the beauty and craftsmanship of your creations. Every stitch you make is a step towards something truly special.
Give it a try and enjoy the rewarding experience of adding scalloped edges to your sewing projects. You’ll be surprised at how this little detail can make a big difference in your handmade items.