

As I dove into sewing heavier fabrics, I quickly realized that standard seams just weren’t cutting it. Whether you’re working with denim, canvas, or upholstery materials, a reinforced seam is essential for durability and strength.
I found that mastering this technique not only enhances the longevity of your projects but also boosts your confidence as a sewist. In this guide, I’ll walk you through the simple steps to sew a reinforced seam that stands up to the toughest materials.
Understanding Reinforced Seams
Reinforced seams enhance the strength of heavy fabrics like denim, canvas, and upholstery. They prevent seams from tearing and extend the lifespan of my projects.
Types of Reinforced Seams
I use several reinforced seam techniques, including:
- Double Stitching: Two parallel rows of stitches boost seam durability.
- Bar Tack Stitches: Short, dense stitches at seam stress points add stability.
- French Seams: Encapsulating raw edges within the seam offers a clean, strong finish.
- Overlocking: Using an overlock machine sews and trims edges simultaneously, preventing fraying.
When to Use Reinforced Seams
Heavy fabrics require reinforcement in situations such as:
- High-Stress Areas: Areas like knees, elbows, or corners endure frequent movement.
- Load-Bearing Projects: Items like bags, backpacks, or upholstery must support weight.
- Frequent Washing: Projects subjected to regular laundering benefit from reinforced seams.
Benefits of Reinforced Seams
- Increased Durability: Strong seams withstand wear and tear effectively.
- Enhanced Appearance: Neat, reinforced seams offer a professional look.
- Improved Functionality: Durable seams ensure projects perform as intended over time.
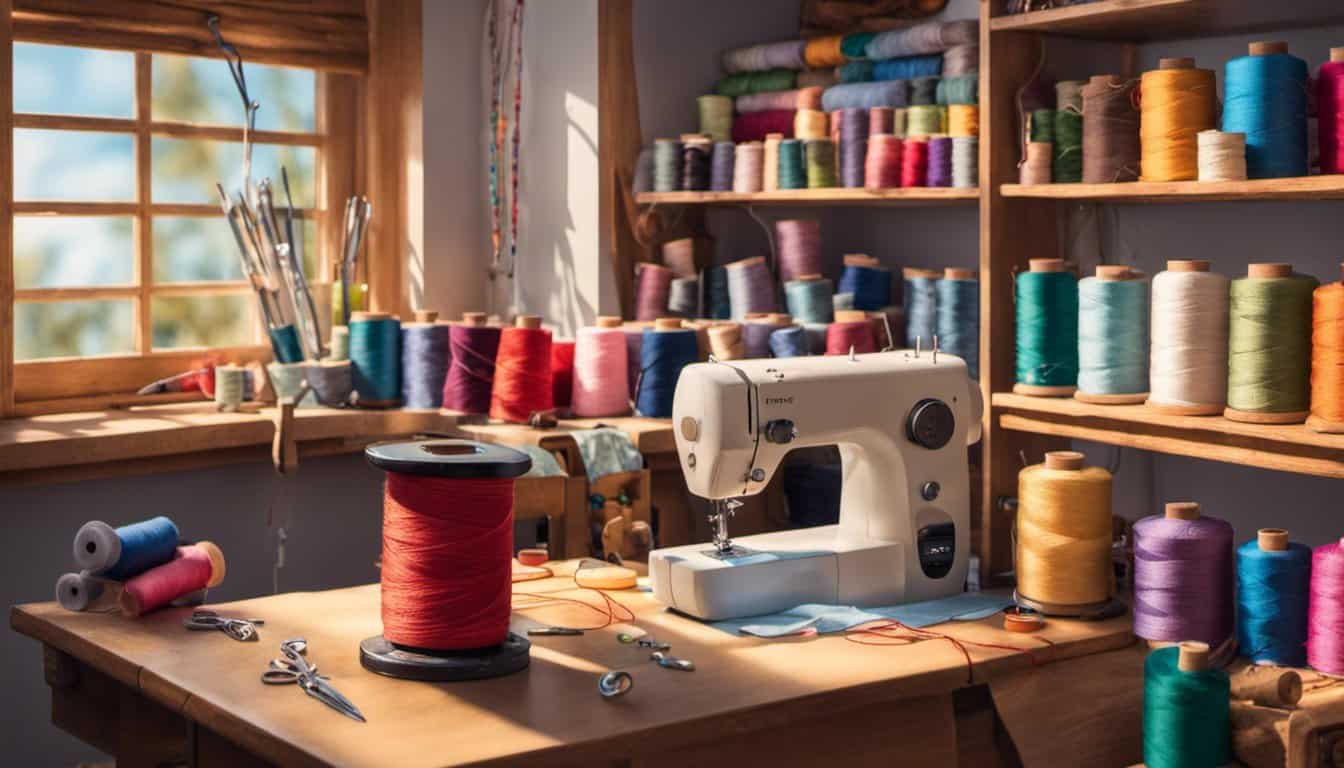
Tools And Materials Needed
To sew reinforced seams for heavy fabrics, gather the following tools and materials:


- Heavy-Duty Sewing Machine: A machine with a strong motor and adjustable presser foot pressure handles thick fabrics like denim or canvas efficiently.
- Matching Thread: Use polyester or nylon thread for durability, choosing a weight appropriate for the fabric thickness.
- Sharp Needles: Select size 14 or larger denim needles to penetrate multiple layers without breaking.
- Seam Ripper: Essential for correcting mistakes quickly and maintaining seam integrity.
- Fabric Clips or Weights: Secure fabric layers in place, preventing shifting during stitching.
- Bias Tape or Interfacing: Strengthens seams, especially in high-stress areas like pockets or garment edges.
- Measuring Tools: A clear tape measure and ruler ensure precise seam allowances and alignment.
- Iron and Ironing Board: Press seams before and after sewing to achieve a professional finish.
- Cutting Tools: Sharp rotary cutters or fabric scissors provide clean, accurate fabric edges.
- Marking Tools: Use fabric chalk or a washable marker to outline seam lines and reinforcement areas.
Ensuring you have these tools and materials prepared streamlines the sewing process, enhancing the quality and durability of your reinforced seams.
Preparing The Fabric
Start by pre-washing your heavy fabric to eliminate shrinkage and ensure colorfastness. Next, iron the fabric thoroughly to remove all wrinkles, providing a smooth surface for sewing. Measure and mark your seam lines accurately using fabric chalk or marking pens, ensuring precision in reinforcement areas. Cut the fabric pieces carefully with sharp scissors or rotary cutters, maintaining straight edges to align seams correctly. Apply interfacing or bias tape to the seam allowances if additional stability is required. Select a heavy-duty thread that matches the fabric type, enhancing seam durability. Choose the appropriate needle size for your fabric to prevent puckering or breaking during stitching. Finally, gather your fabric clips or weights to secure the layers, ensuring they remain in place while you sew reinforced seams.
Tools Checklist
| Tool | Purpose |
|---|---|
| Heavy-duty sewing machine | Handles thick fabrics and multiple layers |
| Durable matching thread | Ensures strong, lasting seams |
| Sharp needles | Prevents fabric damage and stitching issues |
| Fabric clips or weights | Secures fabric layers during sewing |
| Interfacing or bias tape | Adds stability to seam allowances |
| Measuring tools | Ensures accurate dimensions |
| Iron and ironing board | Prepares fabric by removing wrinkles |
| Cutting tools | Provides clean, precise fabric edges |
| Marking tools | Guides accurate seam placement |
By following these preparation steps, you ensure that your heavy fabric is ready for sewing reinforced seams, resulting in durable and professional-quality projects.


Sewing Techniques
Mastering the right sewing techniques ensures your reinforced seams are strong and durable. Here’s how to choose the best stitches and reinforcement methods for heavy fabrics.
Choosing The Right Stitch
Selecting the appropriate stitch is crucial for handling heavy fabrics effectively. I consider factors like fabric weight, seam stress, and desired finish when choosing a stitch. Common stitch types for heavy fabrics include:
- Straight Stitch: Ideal for seams requiring strength without bulk. It provides a clean, simple line that’s easy to execute.
- Double Stitch: Enhances seam durability by sewing two parallel lines, perfect for high-stress areas.
- Zigzag Stitch: Offers flexibility and strength, useful for preventing fabric fraying and adding stretch.
- Triple Needle Stitch: Provides extra reinforcement for areas subjected to heavy wear and tear.
| Stitch Type | Best For | Features |
|---|---|---|
| Straight Stitch | Basic seams | Clean, strong, minimal bulk |
| Double Stitch | High-stress seams | Extra durability, parallel lines |
| Zigzag Stitch | Fray prevention, flexible seams | Flexible, prevents fraying |
| Triple Needle Stitch | Heavy wear areas | Maximum reinforcement, multiple lines |
Reinforcement Methods
Reinforcing seams ensures they can withstand the demands of heavy fabrics. I use several methods to achieve this:
- Backstitching: Secures the beginning and end of a seam to prevent unraveling. I backstitch for extra strength where seams start and stop.
- Double Sewing: Sewing twice along the seam line increases its resilience. I often use this technique for seams under significant stress.
- Topstitching: Adds both reinforcement and a professional finish. I topstitch along the seam for added stability and aesthetic appeal.
- French Seams: Encapsulates raw edges for a clean finish and extra strength. I prefer French seams for garments and items that require neat interiors.
- Bar Tack Stitches: Provides focused reinforcement at stress points. I apply bar tack stitches on corners and areas prone to tension.
Implementing these reinforcement methods guarantees that your heavy fabric projects remain sturdy and long-lasting.
Finishing The Seam
After sewing a reinforced seam, proper finishing ensures durability and a clean appearance. Here’s how I finish my seams:

- Trim Excess Threads
Cutting leftover threads prevents bulk and fraying. I trim threads close to the stitches using sharp scissors to maintain a neat edge.
- Press the Seam
Ironing the seam flat strengthens the bond. I press the seam allowance towards one side, ensuring crisp lines for a professional finish.
- Topstitch for Strength
Adding topstitches reinforces the seam. I use a straight or double needle stitch, spacing stitches every 3-4 mm, especially in high-stress areas.
- Apply Bias Tape or Interfacing
Enclosing seam allowances with bias tape or interfacing adds stability. I sew the tape or interfacing over the seam edges securely to prevent fraying.
- Secure Stitches with Backstitching
Backstitching at the beginning and end of the seam locks the stitches. I sew a few extra stitches backward to prevent the seam from unraveling during use.
« 10 Genius Tips for Mastering the Zigzag Stitch for Stretch Fabrics
Unlock Unmatched Durability: How to Sew a Flat Felled Seam Like a Pro »
By following these steps, I ensure that my reinforced seams are both strong and aesthetically pleasing, perfect for heavy fabrics like denim, canvas, and upholstery.
Tips And Tricks
Choose the Right Thread and Needle
Selecting strong, durable thread and the appropriate needle ensures reinforced seams withstand heavy use. I use polyester or nylon thread paired with a size 14 or 16 needle for fabrics like denim and canvas.
Use Double Stitching
Double stitching enhances seam strength. I sew two parallel lines with minimal spacing to distribute stress evenly across the seam.
Implement Bar Tack Stitches
Applying bar tack stitches at seam ends prevents unraveling. I place three to five bar tacks at each end of the seam for added security.
Opt for French Seams
French seams provide a clean finish and extra durability. I sew the fabric inside out first, then turn it right side out and sew again for a professional look.

Utilize Bias Tape or Interfacing
Adding bias tape or interfacing reinforces seams and maintains shape. I bind each seam with bias tape or attach interfacing before sewing to enhance stability.
Secure Seams with Backstitching
Backstitching reinforces seam beginnings and ends. I backstitch for 2-3 inches at both the start and finish to prevent seam separation.
Press Seams Thoroughly
Pressing seams flat ensures strength and a polished appearance. I use an iron to press each seam after sewing, following the fabric’s specific heat settings.
Use Heavy-Duty Sewing Machines
A heavy-duty sewing machine handles thick fabrics efficiently. I invest in a machine capable of sewing multiple layers without skipping stitches.
Maintain Tension Settings
Proper tension prevents puckering and weak seams. I adjust the tension settings on my machine based on fabric weight and thread type for optimal results.

Trim Excess Thread
Removing excess thread reduces bulk and strengthens seams. I trim threads close to the fabric after sewing and before pressing.
Reinforce High-Stress Areas
Focusing on high-stress areas like pockets and corners extends garment life. I add extra stitches or interfacing to these points for additional reinforcement.
Test on Scrap Fabric
Testing techniques on scrap fabric prevents mistakes on the main project. I always practice new methods on a fabric scrap to ensure the desired outcome.
Keep Tools Organized
Organized tools streamline the sewing process. I keep needles, threads, and clips in designated containers for easy access and efficiency.
Use Quality Fabric Clips
Fabric clips hold layers securely without damaging the fabric. I prefer using metal clips or specialized fabric clips over pins for reinforced seams.

Maintain Consistent Seam Allowance
Consistent seam allowances ensure uniformity and strength. I measure and mark seam lines accurately before sewing to maintain consistent spacing.
Invest in Good Lighting
Proper lighting enhances precision in sewing. I position my sewing machine in a well-lit area to clearly see seam lines and details.
Regularly Clean and Maintain Equipment
Well-maintained equipment operates smoothly and prolongs machine life. I regularly clean the sewing machine and replace needles to maintain performance.
Utilize Seam Guides
Seam guides help maintain straight, even seams. I use built-in machine guides or external markings to keep stitching aligned and consistent.
Incorporate Topstitching for Extra Strength
Topstitching adds both strength and a decorative finish. I sew a row of topstitches along the seam line for additional reinforcement and visual appeal.

Store Projects Properly
Proper storage prevents fabric wrinkles and seam damage. I store completed projects flat or hung appropriately to maintain seam integrity.
Refer to Authoritative Sewing Resources
Consulting reliable sources enhances sewing techniques. I refer to sewing manuals, reputable online tutorials, and expert blogs for advanced reinforced seam methods.
Practice Consistently
Regular practice improves seam quality and sewing skills. I dedicate time to practice sewing reinforced seams on various heavy fabrics to master the techniques.
Use Appropriate Marking Tools
Accurate markings guide precise sewing. I use fabric chalk or washable markers to outline seams clearly before sewing reinforced seams.
Choose Suitable Fabric Weight
Matching fabric weight to project requirements ensures durability. I select heavier fabrics like canvas or denim for projects needing reinforced seams to handle increased stress.

Optimize Machine Settings for Fabric Thickness
Adjusting machine settings accommodates fabric thickness. I modify stitch length and tension settings based on fabric density to achieve strong, even seams.
Utilize Pattern Stabilizers
Pattern stabilizers prevent fabric shifting during sewing. I apply stabilizers to patterns before sewing reinforced seams to maintain accuracy and seam strength.
Take Breaks to Prevent Fatigue
Taking regular breaks maintains focus and sewing quality. I pause periodically during extended sewing sessions to stay alert and ensure precise seam construction.
Label Seams for Future Reference
Labeling seams aids in future repairs and modifications. I mark reinforced seams clearly to identify them when adjustments or maintenance are needed.
Explore Various Reinforcement Techniques
Experimenting with different techniques enhances seam durability. I try methods like flat-felled seams and lap seams to determine the best reinforcement for each project.

Keep a Sewing Journal
Documenting techniques and settings improves future projects. I record successful reinforcement methods and machine settings in a sewing journal for reference.
Stay Updated with Sewing Trends
Keeping up with trends provides new reinforcement ideas. I follow sewing communities and publications to learn about innovative reinforced seam techniques.
Ensure Accurate Fabric Cutting
Precise cutting ensures seamless reinforcement. I use sharp scissors or rotary cutters to achieve clean, straight edges before sewing reinforced seams.
Select Compatible Thread Types
Matching thread types to fabric prevents seam failure. I choose threads that are compatible with both the fabric and the intended use of the project to ensure durability.
Implement Layered Seam Techniques
Layering seams increases strength and durability. I sew multiple layers for high-stress areas, enhancing the overall resilience of the sewn project.
Maintain Consistent Speed
Sewing at a consistent speed ensures uniform seam quality. I control my sewing machine’s speed to maintain even stitching and proper thread tension throughout the project.
Use Specialized Presser Feet
Special presser feet aid in sewing heavy fabrics. I use walking feet or zipper feet to handle thick layers and complex seam reinforcement without shifting fabric.
Conduct Final Quality Checks
Inspecting seams ensures they meet durability standards. I perform thorough quality checks on all reinforced seams to confirm they are secure and properly finished.
Conclusion
Working with heavy fabrics can be challenging but mastering reinforced seams makes all the difference. I love seeing projects come together sturdily and beautifully. With the right techniques and tools you can tackle any heavy fabric with confidence. Keep practicing and experimenting with different stitches to find what works best for you. Happy sewing!


