Are you interested in trying out a new hobby that is both relaxing and creative? Look no further than cross stitching! This timeless craft is perfect for anyone looking to unwind and create beautiful designs with needle and thread. Whether you’re a complete beginner or have some experience with other crafts, cross stitching is a great way to express your creativity and make something truly unique. In this article, we’ll guide you through the basics of getting started with cross stitching, from choosing the right materials to mastering essential techniques. So grab a cup of tea, sit back, and let’s dive into the wonderful world of cross stitching!
Have you ever admired those intricate cross stitch designs and wondered how they were made? Well, wonder no more! In this article, we’ll show you how to get started with cross stitching, a versatile and enjoyable craft that allows you to create beautiful pieces of art. Whether you want to make personalized gifts for your loved ones or simply relax and unwind after a long day, cross stitching is the perfect hobby for you. We’ll walk you through everything you need to know, from selecting the right materials to learning essential stitches. So, let’s dive in and discover the joy of cross stitching together!
What is Cross Stitching?
Cross stitching is a delightful and timeless craft that allows you to create stunning designs using needle and thread. It’s a perfect blend of relaxation and creativity, making it a favorite hobby for many craft enthusiasts like yourself. Whether you’re an experienced crafter or a complete beginner, cross stitching is a great way to unwind and express your artistic side.
In cross stitching, you use a special fabric called Aida cloth, which has evenly spaced holes woven into it. This makes it easy to create precise, symmetrical stitches. With a needle and colorful embroidery floss, you’ll create beautiful patterns one stitch at a time.
The technique itself is rather simple. You’ll follow a pattern, typically printed on a chart, that shows you exactly where to place each stitch. The stitches are made by inserting the needle from the back of the cloth, pulling it through to the front, and then crossing over the hole diagonally to form an X shape. This repetitive process is not only soothing but also produces intricate and impressive designs.
The beauty of cross stitching lies in its versatility. You can choose from countless patterns and designs, ranging from classic samplers to modern motifs. Whether you want to create a lovely landscape, a cute animal, or a personalized gift, there is a pattern out there to suit your taste.


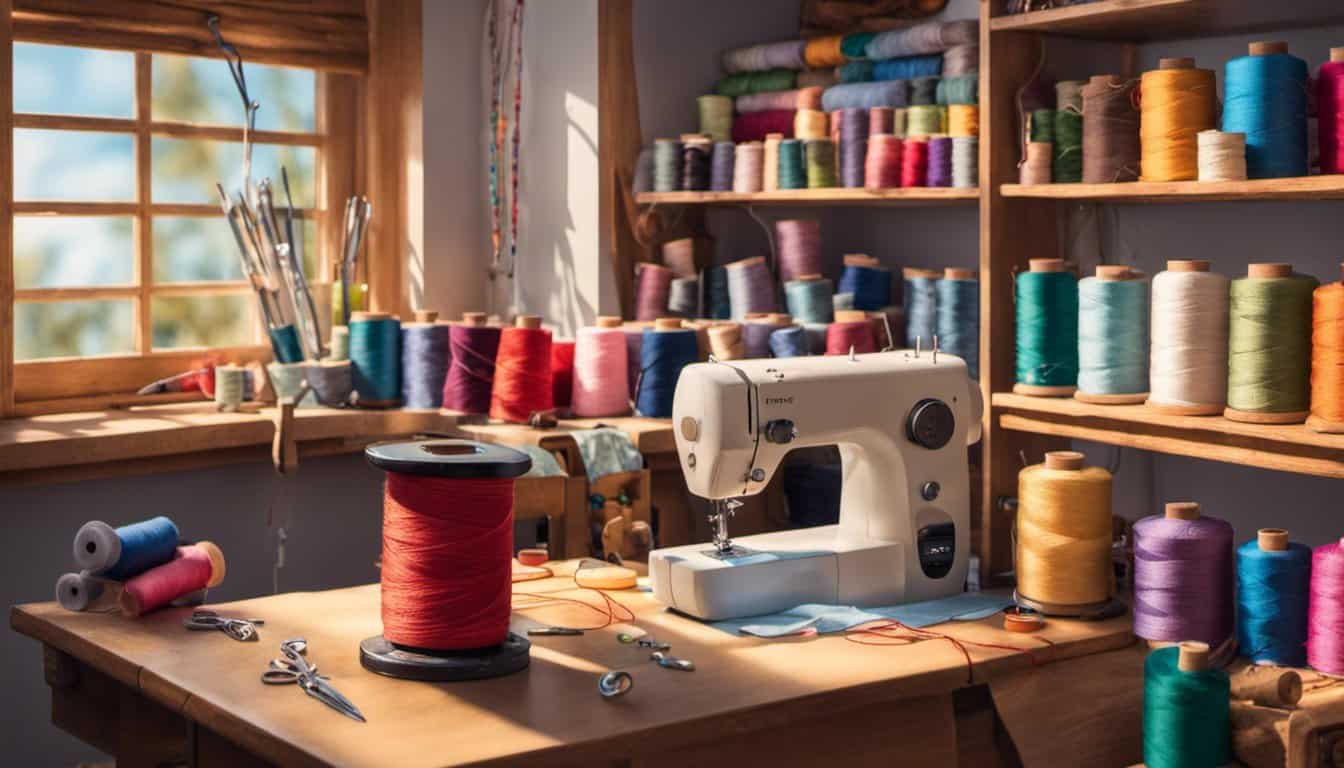
Cross stitching is also an accessible hobby, as it requires minimal equipment to get started. All you need are some Aida cloth, embroidery floss, a needle, and a hoop to keep the fabric taut while you work. You can easily find these supplies at any craft store or online.
Essential Supplies for Cross Stitching
When it comes to cross stitching, having the right supplies is crucial. Here are the essential tools and materials you’ll need to get started on your cross stitching journey:
1. Aida Cloth
Aida cloth is the most common fabric used for cross stitching. It has a grid-like structure that makes it easy to count stitches and keep your designs straight. You can choose from various sizes of Aida cloth, depending on your preference and the level of detail in your pattern.


2. Embroidery Needles
Investing in a good set of embroidery needles is a must for cross stitching. These needles have a larger eye to accommodate embroidery floss, and their sharp tips make it easy to stitch through the fabric. Start with a variety pack so you can experiment with different sizes and find what works best for you.
3. Embroidery Floss
Embroidery floss is the colorful thread used to create designs in cross stitching. It’s made up of six strands that can be separated and used individually for finer details. There’s a vast array of colors to choose from, allowing you to bring your designs to life.
4. Embroidery Hoop
An embroidery hoop is used to stretch and hold your fabric taut while stitching. It helps maintain an even tension and prevents the fabric from puckering. Opt for a hoop that’s slightly larger than your design to give yourself enough space to work comfortably.
5. Scissors
A pair of sharp, small scissors is essential for cross stitching. Use them to cut your thread cleanly and neatly. Make sure to keep them dedicated to your stitching projects to avoid dulling the blades.
6. Pattern and Graph Paper
Having a pattern to follow is essential, especially for beginners. You can either download patterns online or find them in cross stitching books and magazines. Additionally, graph paper can be handy for designing your own patterns or making adjustments to existing ones.

Choosing a Pattern
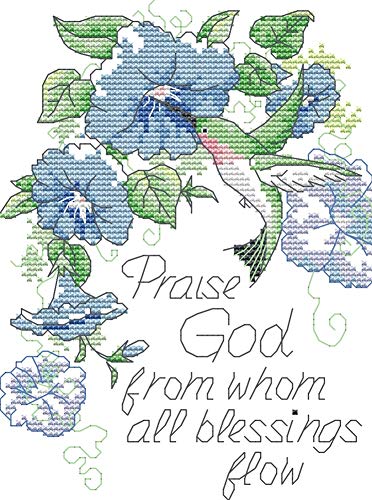
When it comes to cross stitching, one of the most exciting parts is choosing a pattern that speaks to you and reflects your personal style. With endless options available, you’re sure to find a design that captivates your imagination. Here are a few tips to help you select the perfect pattern:
1. Start with Simple Designs: As a beginner, it’s best to begin with simpler designs that have fewer colors and stitches. This will help you build your skills and confidence before moving on to more intricate patterns. Look for patterns labeled as “beginner” or “easy” to get started.
2. Consider Your Interests: Think about what interests you and what kind of design you’d like to create. Are you drawn to floral motifs, animals, landscapes, or geometric patterns? Find a pattern that aligns with your interests, as it will make the stitching process more enjoyable.
3. Look for Clear Instructions: When browsing patterns, make sure they come with clear instructions and diagrams. This will help you understand the stitches and techniques required. Look for patterns that include a key, color chart, and any special instructions.
4. Choose the Right Size: Consider the size of the pattern and how long it will take you to complete it. Larger patterns will require more time and effort, so make sure you’re ready for the commitment. If you’re short on time or prefer quicker projects, look for smaller designs that can be finished in a shorter amount of time.
« Discover the Shocking Truth: Sewing vs. Gluing – Which Method Reigns Superior for Fabric Repairs?
Discover the Ultimate Sewing Machine: Unveiling the Best Price-Feature Combo »
5. Adaptability: Keep in mind that cross stitch patterns can be adapted and customized to suit your preferences. Feel free to change colors, add or remove elements, or combine different patterns to create a unique design that truly reflects your personality.
By following these tips, you’ll be well on your way to selecting a pattern that excites and inspires you. Remember, cross stitching is all about enjoying the process and allowing your creativity to shine through. So go ahead, browse through the wide variety of patterns available, and have fun choosing the perfect one for your next cross stitching project.
Preparing Your Fabric
When it comes to cross stitching, one of the most important steps is preparing your fabric. This will ensure that your stitches are even and your finished piece looks stunning. Here are a few tips to help you get started:
Choosing the Right Fabric: The first thing you’ll need to do is choose the right fabric for your cross stitching project. There are a variety of fabrics available, but the most common ones are Aida cloth and linen. Aida cloth has a regular square pattern, making it easy to count your stitches, while linen has a softer and more natural look. Consider the size and complexity of your design when selecting your fabric – smaller designs may require a higher thread count fabric for more detail.
Cutting and Preparing the Fabric: Once you have chosen your fabric, it’s time to cut and prepare it for stitching. Start by measuring and cutting out the desired size for your project, leaving a few inches of extra space around the edges. This will give you enough room to hold onto the fabric while stitching. To prevent fraying, use a pair of pinking shears to cut along the edges of the fabric. Then, gently wash and iron the fabric to remove any wrinkles or creases.

Securing the Edges: To ensure that your fabric stays taut and doesn’t unravel as you work, it’s important to secure the edges. One common method is to use masking tape to tape the edges of the fabric to a flat surface, such as a table or a piece of foam board. Alternatively, you can use a hoop or a frame to hold the fabric in place. Whichever method you choose, make sure the fabric is stretched tight and smooth before you begin stitching.
Marking the Center: Before diving into your cross stitching pattern, it’s helpful to mark the center of your fabric. This will make it easier to start your design and ensure that it is centered properly. To find the center, fold your fabric in half horizontally and vertically, and lightly mark the intersection with a fabric marker or a small stitch. This will serve as your reference point for the rest of your stitching.
By taking the time to prepare your fabric properly, you’ll set yourself up for success in your cross stitching journey. So grab your fabric, get it ready, and let’s move on to the next step: choosing your threads and needles.
Understanding Cross Stitching Patterns
When it comes to cross stitching, one of the most exciting aspects is choosing the perfect pattern. Whether you’re a beginner or have years of experience, finding a pattern that speaks to your creative spirit is essential. Here’s a breakdown of how to understand and choose cross stitching patterns.
Styles of Cross Stitching Patterns
Cross stitching patterns come in various styles, ranging from traditional to modern, whimsical to elegant. You’ll find patterns for everything from flowers and animals to landscapes and abstract designs. Explore different styles to discover what resonates with you and matches your skill level.

Reading a Cross Stitching Pattern
Cross stitch patterns are typically presented as a grid, with each square representing a stitch. The symbols within each square indicate the color of thread you should use. It may seem overwhelming at first, but with a little practice, deciphering patterns becomes second nature.
Choosing the Right Difficulty Level
Consider your expertise and the time you’re willing to dedicate to a project when choosing a pattern. Some designs are more intricate, requiring precise counting and attention to detail. Beginners may want to start with simpler patterns and gradually increase the difficulty as their skills develop.
Personalizing Your Patterns
Once you become more comfortable with cross stitching, you can start personalizing patterns to make them your own. Add your initials, change the colors, or modify elements to suit your preferences. This allows you to create truly unique and individualized pieces.
Exploring Online Resources
There are countless websites and online communities dedicated to cross stitch patterns. Many offer free patterns, while others provide a variety of designs for purchase. You can also find forums where fellow cross stitch enthusiasts share tips, tricks, and inspiration.
As you delve into the world of cross stitching patterns, remember to have fun and let your creativity shine. With practice, patience, and a bit of imagination, you’ll soon master the art of cross stitching and create stunning works of art. So go ahead, pick out a pattern that catches your eye and get ready to bring it to life with your needle and thread.

Starting Your First Stitch
Now that you have all your materials ready and prepared, it’s time to take your first stitch! Don’t worry, it’s easier than you think. Just follow these simple steps and you’ll be on your way to creating beautiful cross stitch designs.
- Thread your needle: Take your embroidery floss, which is made up of six strands, and separate out two strands. Thread these two strands through the eye of your needle and leave a small tail.
- Anchor your thread: Start your stitch on the backside of your fabric. To anchor your thread, bring your needle up from the back and leave a small loop. Then, bring your needle back down through the loop to secure it. This will prevent your thread from pulling through when you start stitching.
- Position your fabric: Hold your fabric with one hand and use your other hand to guide your needle. Start by positioning your needle on the front side of your fabric where you want to make your first stitch.
- Make your first stitch: To make a basic cross stitch, bring your needle up through the fabric from the bottom left corner of the desired stitch. Then, bring your needle down through the top right corner of the stitch to create a diagonal line. Finally, bring your needle up through the bottom right corner of the stitch to complete the cross.
- Continue stitching: Repeat the process for each stitch, following your pattern. Remember to keep your stitches uniform in size and tension for a neat and professional look.
- Securing your thread: When you’ve finished stitching an area, secure your thread on the backside of your fabric by making a small knot. This will keep your stitches in place.
And there you have it! You’ve just completed your first cross stitch. Remember, practice makes perfect, so don’t be discouraged if your stitches aren’t perfect right away. With time and practice, you’ll become more skilled and confident in your cross stitching abilities.
Tips for Consistent Stitching
When it comes to cross stitching, achieving consistently beautiful and neat stitches is key. Whether you’re a beginner or have been stitching for years, here are some tips to help you maintain a consistent stitching style:
- Use a hoop or frame: One of the best ways to ensure even tension is to use a hoop or frame. This will keep your fabric taut and prevent your stitches from becoming too loose or too tight. It also helps in keeping your stitches more uniform.
- Use the right needle: Selecting the correct needle size for your fabric is important. If your needle is too big, it can create larger holes in the fabric and affect the overall look of your stitches. On the other hand, a needle that is too small might cause difficulty in stitching. Experiment with different needle sizes until you find the one that works best for you.
- Work in good lighting: Adequate lighting is essential for accurate stitching. Make sure you have a well-lit workspace to help you see your stitches clearly. This will prevent mistakes and ensure that your stitches are consistent throughout your project.
- Pay attention to your tension: Consistent tension is essential for achieving uniform stitches. Avoid pulling your thread too tightly or leaving it too loose. Find a balance that allows your stitches to lie smoothly on the fabric without puckering or distorting the pattern.
- Take breaks and relax: Stitching for long periods of time can lead to fatigue and affect your stitching quality. Take short breaks, stretch your fingers, and relax your eyes. This will help maintain your focus and ensure that your stitches remain consistent and accurate.
Remember, practice makes perfect! Don’t be discouraged if your stitches aren’t perfect right away. With time and practice, you’ll develop your own rhythm and technique. The more you stitch, the better you’ll become at maintaining consistency in your work.
Adding Colors and Details
Once you have mastered the basics of cross stitching, it’s time to add some color and details to your designs. This is where the real fun begins! Here are some tips to help you in this exciting stage of your cross stitching journey:

Choose a Colorful Palette
When selecting thread colors for your design, don’t be afraid to experiment with a vibrant palette. Consider the overall look and feel you want to achieve. If you’re stitching a floral design, opt for soft pastels or rich, bold colors for a striking effect. For a more subdued look, choose a monochromatic color scheme. Remember, the possibilities are endless – have fun and let your creativity shine!
Don’t Forget the Blending
Cross stitching allows you to create depth and texture by blending different shades of thread. Experiment with blending two or more colors together to achieve subtle gradients and shadows. This technique can breathe life into your design and make it truly stand out. Start by stitching with one color as your base, then introduce another color gradually, blending where necessary. The results can be absolutely stunning.
Add Embellishments
If you want to add even more interest and dimension to your cross stitch project, consider incorporating embellishments. From beads and sequins to ribbons and charms, these little extras can take your design to the next level. Be mindful not to overdo it though – a subtle touch of sparkle or an accent detail can make all the difference.
Pay Attention to Details
When it comes to cross stitching, attention to detail is key. Take the time to ensure that your stitches are neat and even. Double-check that you are following the pattern correctly, especially when it comes to intricate designs or specialty stitches. Don’t rush through this stage – slow and steady wins the race!
By following these tips, you’ll be well on your way to creating stunning cross stitch designs with beautiful colors and intricate details. Remember, practice makes perfect, so keep at it and enjoy the process. Happy stitching!

Finishing Your Cross Stitch Project
Now that you’re nearing the completion of your cross stitch project, it’s time to finish it off in style. Here are a few steps to help you bring your masterpiece to its final form:
1. Remove the hoop or frame: Gently release your fabric from the hoop or frame, being careful not to tug on the stitches. This will help prevent any distortion in the fabric and ensure your design stays crisp and even.
2. Trim the excess fabric: Once your fabric is free from the hoop, you can trim off any excess fabric around the edges, leaving about an inch of space. This will make it easier for you to mount or frame your finished piece later on.
3. Wash and iron your project: Before you move on to the next step, give your cross stitch a gentle wash to remove any dirt or oil from your hands that may have transferred onto the fabric. Use lukewarm water and a mild detergent, and be sure to rinse it thoroughly. After washing, lay your project flat on a clean towel and allow it to air dry. Once dry, place a clean cloth over your project and iron it on a low setting to remove any wrinkles.
4. Choose your finishing method: There are several ways to showcase your completed cross stitch. Here are a few options:

- Framing: Visit your local craft or framing store to select a frame that complements your design. Be sure to choose acid-free materials to protect your work.
- Mounting: Stretch your finished piece onto a piece of mounting board, securing the fabric tightly. Trim off excess fabric and use pins or adhesive to hold it in place.
- Turning it into a pillow or ornament: If you prefer a more functional display, consider turning your cross stitch into a pillow, ornament, or even a bookmark. Just stitch a backing fabric onto your project and finish the edges neatly.
Remember, the finishing touches you choose will depend on your personal preference and the intended use of your cross stitch.
Conclusion
Now that you have reached the end of this beginner’s guide to cross stitching, you are ready to embark on a relaxing and creative journey. Cross stitching is a timeless craft that allows you to unwind while creating beautiful designs with just a needle and thread. Whether you are a beginner or have experience in other crafts, cross stitching is a hobby that can be enjoyed by anyone.
In this article, we have covered the basics of getting started with cross stitching, from choosing the right materials to mastering essential techniques. We have also highlighted the versatility of cross stitching, with countless patterns and designs available to suit your preferences.
The best part about cross stitching is that it requires minimal equipment, making it an accessible hobby for everyone. Once you have completed your cross stitch project, we have provided tips on how to finish it off, whether it’s removing the hoop or frame, trimming excess fabric, washing and ironing the project, or choosing a finishing method.
So go ahead, grab your needle and thread, and start stitching your way to beautiful creations. Happy cross stitching!