Ever thought about diving into the world of leather crafting? Sewing with leather might seem intimidating at first, but with the right tips and tools, you’ll discover it’s a rewarding and creative endeavor. Imagine transforming a simple piece of leather into a stylish wallet, a chic handbag, or even a custom jacket.
Essential Tools for Sewing With Leather
Sewing with leather requires specific tools to achieve professional results. Using the right equipment ensures a smoother sewing experience.
Choosing the Right Needles
Leather sewing demands specialized needles. You need leather needles, sometimes called chisel point or wedge point needles. These come in various sizes, such as 80/12 and 90/14. The chisel shape pierces tough leather without tearing it. Schmetz and Organ are reliable brands offering quality leather needles.
Selecting Durable Threads
Leather pieces need strong, durable threads to hold them together. Polyester or nylon threads are ideal due to their high tensile strength and resistance to wear. Size 69 or Tex 70 threads are common for leather projects. Brands like Coats and Gutermann provide excellent options for leather sewing.
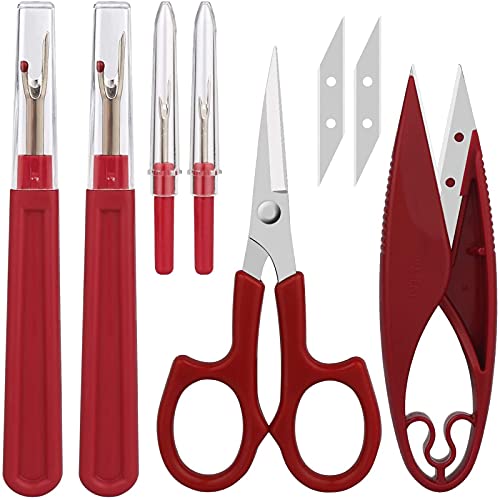
Best Leather Cutting Tools
Accurate cutting tools for leather sewing are essential. Rotary cutters and leather scissors are the primary options. Rotary cutters, particularly with a 45mm blade, offer precision and ease of use. Leather scissors, featuring long blades and sharp edges, like those from Gingher or Wiss, ensure clean cuts. Utilize a self-healing cutting mat to protect your workspace and extend blade life.
These essential tools give you a solid foundation for successful leather sewing projects.


Preparing Leather for Sewing
Proper preparation ensures your leather sewing project achieves high-quality results.
Cleaning and Conditioning
Clean and condition leather to maintain its quality. Use a damp cloth to gently wipe the surface, removing dirt. Apply a leather conditioner sparingly, using a soft cloth to keep the material supple and smooth. Consistent conditioning prevents cracking and ensures durability.
Marking and Cutting Techniques
Marking and cutting leather require precision. Use a ruler and tailor’s chalk for accurate markings. Rotary cutters or leather scissors provide clean cuts, while a cutting mat protects surfaces. Always cut from the backside of the leather to avoid visible marks on the finished product. Accurate cutting ensures pieces fit together seamlessly, enhancing the final product’s appearance.


Sewing Techniques for Leather
When sewing with leather, every step requires precision and knowledge. You must use the right techniques to ensure your projects are durable and professional.
Basic Stitches for Leather
Use strong, steady stitches when working with leather. Three stitch types are often recommended:
- Running Stitch: The running stitch is simple yet strong. Push the needle through the leather, leaving equal spaces between stitches.
- Backstitch: The backstitch is perfect for added strength. After each stitch, bring the needle back one hole and then forward two holes.
- Saddle Stitch: The saddle stitch is necessary for double protection. Use two needles and thread from both sides of the seam, meeting in the middle for each stitch.
Including these stitches helps ensure robust seams. Practicing each stitch on scrap leather can improve consistency.
Handling Thick Leather Layers
Thick leather layers can be challenging. Proper handling minimizes stress on tools and materials.
- Use a Thicker Needle: Opt for a thicker, stronger needle designed for leather. This helps penetrate multiple layers without breaking.
- Adjust Your Machine: If using a machine, increase the presser foot pressure. It ensures even stitching without skipping.
- Slow Down: Slower, deliberate stitching provides more control. It reduces mistakes and ensures even stitches throughout the project.
By mastering these techniques, you create durable, high-quality leather items.

Finishing Touches for Leather Projects
Adding the perfect finishing touches enhances the overall appeal of your leather crafts. These techniques ensure your leather projects stand out and last longer.
Edge Finishing Methods
Edges require specific attention to give your leather pieces a polished look. Burnishing smooths and seals the edges, reducing fraying. Use a burnishing tool and gum tragacanth to achieve smooth, shiny edges. Edge painting adds a professional touch. Apply edge paint in thin layers, letting each dry before adding the next. Sand between layers for a refined finish. Adding an edge binding is another method. Leather binding or fabric tape covers raw edges, providing a neat border.
Adding Fasteners and Embellishments
Fasteners add functionality and aesthetics. Rivets, snaps, and magnetic clasps are common choices. Rivets secure layers of leather; use a rivet setter and anvil for best results. Snaps provide easy closures for bags and wallets. Install snaps using a snap setter tool. Magnetic clasps offer a sleek finish; they require minimal sewing. Embellishments like studs, embroidery, and tooling personalize your projects. Use a stud setter for even placement. Embroidery designs on leather add intricate details but need sharp needles and waxed thread for smooth stitching. Tooling allows for custom designs on vegetable-tanned leather; moisten the leather first for deeper impressions.
By mastering these finishing techniques, your leather projects will have a polished, professional look that enhances their durability and appeal.
Caring for Leather Creations
Caring for your leather creations ensures they remain durable and attractive. Proper maintenance and storage keep leather items in top condition.
Maintenance Tips
« Unlock Sewing Secrets: Top Patterns & Tips Every Beginner Must Know
Unlock the Secrets: How Do Sewing Machines Work and Avoid These Common Pitfalls »
Clean regularly. Wipe leather surfaces with a soft, damp cloth to remove dust and dirt. Use a gentle leather cleaner for tougher stains. Moisturize. Apply a high-quality leather conditioner every 6-12 months to keep the material supple and prevent cracking. Avoid excess moisture. Keep leather items away from water to prevent staining and warping. If they get wet, dry them slowly at room temperature. Protect from heat. Avoid placing leather near heat sources like radiators to prevent drying and cracking.
Long-Term Storage Advice
Store in a cool, dry place. Keep leather items in a well-ventilated space with low humidity to prevent mildew and mold growth. Use a breathable cover. Avoid plastic bags; instead, use cotton or fabric covers to allow air circulation. Maintain shape. Stuff shoes, bags, and other leather items with acid-free paper to retain their shape. Avoid heavy stacking. Do not stack heavy items on top of each other, as this can cause deformation.
Conclusion
Sewing with leather can be a deeply satisfying and creative endeavor. By mastering essential tools and techniques, you’ll be well on your way to creating beautiful, durable leather projects. Remember to take your time with each step, from stitching to finishing touches, to ensure high-quality results. With proper care and maintenance, your leather creations will not only look great but also stand the test of time. So grab your tools and start experimenting—there’s a whole world of leather crafting waiting for you!