Ever stumbled upon a seam that looks flawlessly neat from both sides? That’s the magic of a Hong Kong seam. I’ve always been fascinated by how certain stitching techniques can elevate a garment’s finish, and the Hong Kong seam is no exception.
Understanding the Hong Kong Seam
In this section, I explore the Hong Kong seam, detailing its definition, unique characteristics, and historical background. Grasping these elements lays the groundwork for effectively incorporating this technique into your sewing projects.
Definition and Characteristics
The Hong Kong seam is a professional stitching technique known for its clean finish visible on both garment sides. Key characteristics include:
- Twin Seam Finish: Both sides display the seam allowance neatly enclosed.
- Topstitching: A visible line along the seam enhances durability and aesthetics.
- Edge Binding: Fabric edges are carefully folded and stitched to prevent fraying.
- Versatility: Suitable for various fabrics, including wool, cotton, and synthetics.
- Professional Appearance: Creates a polished look, often used in high-end tailoring.
History and Origin
The Hong Kong seam originated in the mid-20th century, developed to meet the high standards of the garment industry in Hong Kong. It gained popularity for its ability to produce garments with a superior finish. Over time, the technique spread globally, becoming a staple in both commercial and home sewing for achieving professional-quality seams.
Benefits of a Hong Kong Seam
I appreciate the Hong Kong seam for its exceptional qualities that enhance my sewing projects. This seam offers both practical advantages and visual appeal.
Durability and Strength
The Hong Kong seam ensures long-lasting garments. By using twin rows of stitching, it reinforces the seam, preventing unraveling. Topstitching adds extra strength, making it ideal for high-stress areas like collars and cuffs. Additionally, edge binding protects fabric edges from fraying, extending the garment’s lifespan.


Aesthetic Appeal
The Hong Kong seam provides a clean, professional finish on both sides of the fabric. Its smooth appearance is perfect for visible seams in tailored clothing. The precise stitching enhances the garment’s overall look, making it suitable for both casual and formal pieces. This seamless look also allows for versatile fabric choices, maintaining elegance across different materials.
Tools and Materials Needed
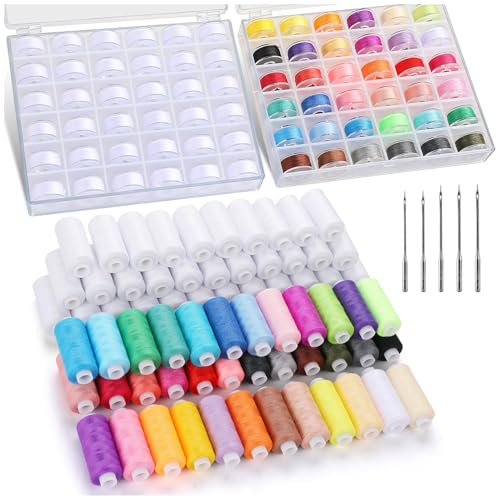
To sew a Hong Kong seam, I gather the following tools and materials:
- Sewing Machine: A reliable machine with a straight stitch setting ensures precise stitching.
- Quality Thread: Polyester or nylon threads provide strength and durability for twin rows of stitching.
- Needles: Size 80/12 or 90/14 needles suit most fabric types used in this seam.
- Edge Binding or Bias Tape: Prefabricated binding or DIY bias tape secures fabric edges and prevents fraying.
- Scissors: Sharp fabric scissors for clean cutting of threads and materials.
- Pins and Pin Cushion: For holding fabric layers together before stitching.
- Measuring Tape: Accurate measurements ensure consistent seam lengths and binding widths.
- Iron and Ironing Board: Pressing seams and bindings enhances the professional finish.
- Seam Ripper: Useful for correcting any stitching mistakes efficiently.
- Fabric of Choice: Suitable for your project, whether it’s cotton, linen, or another material.
Having these tools and materials on hand makes sewing a Hong Kong seam straightforward and ensures a polished, durable finish on your garments.


How to Sew a Hong Kong Seam
Sewing a Hong Kong seam adds a professional finish to your garments. Here’s how I do it step by step.
Preparing Your Fabric
- Cutting the Fabric: Measure and cut your fabric pieces accurately. Use sharp scissors to ensure clean edges.
- Marking the Seam: Use tailor’s chalk to mark the seam allowance, typically 5/8 inch, ensuring consistency.
- Pressing the Fabric: Iron the fabric pieces to remove any wrinkles. This makes sewing easier and more precise.
- Binding Preparation: Cut edge binding or bias tape to the required length. Pre-fold the binding if necessary to simplify the stitching process.
Step-by-Step Sewing Process
- Pinning the Seam: Align the fabric pieces with right sides together. Pin the edges securely along the marked seam allowance.
- First Stitch Line: Sew the first row of stitches about 1/4 inch from the edge. Use a straight stitch for durability.
- Second Stitch Line: Sew a second row of stitches parallel to the first, approximately 1/4 inch apart. This twin seam provides extra strength.
- Topstitching: Turn the fabric right side out. Sew a topstitch along the seam line, reinforcing high-stress areas like collars or cuffs.
- Applying Edge Binding: Attach the edge binding by sewing it close to the seam line. This prevents fraying and gives a clean finish.
- Final Pressing: Iron the completed seam to set the stitches and ensure a smooth, professional appearance.
By following these steps, you can achieve a flawless Hong Kong seam that enhances the quality and durability of your garments.
Tips for Perfecting Your Hong Kong Seam
Achieving a flawless Hong Kong seam requires attention to detail and the right techniques. Here are my top tips to help you master this professional stitching method:
- Choose the Right Fabric
Selecting a suitable fabric ensures the seam lies flat and maintains durability. I prefer using medium-weight materials like cotton, linen, or lightweight wools for optimal results.
- Use Quality Thread
High-quality polyester or cotton threads prevent puckering and add strength to the seam. I always match the thread color to the fabric for a seamless appearance.

- Accurate Cutting and Marking
Precise measurements and markings lay the foundation for a perfect seam. I use fabric scissors and tailor’s chalk to mark stitching lines accurately.
- Consistent Stitch Length
Maintaining a uniform stitch length enhances the seam’s strength and appearance. I typically set my sewing machine to a 3-step stitch for balanced results.
- Secure Pinning
Proper pin placement prevents fabric shifting during sewing. I space pins every 2 inches along the seam line to keep layers aligned.
- Even Topstitching
Straight and consistent topstitching reinforces the seam and adds a professional finish. I use a contrasting thread color to highlight the seam details.
- Pressing Techniques
Pressing the seam at each step ensures a crisp and neat finish. I press the seam allowances open before topstitching to maintain structure.
- Edge Binding Application
« Sewing Terminology 101: The Essential Glossary Every Newbie Needs to Know
10 Best Online Resources for Learning to Sew You Can’t Miss in 2024 »
Carefully applying edge binding prevents fraying and gives the seam a polished look. I use a zigzag stitch to secure the binding edges neatly.
- Test on Scrap Fabric
Practicing on scrap pieces helps refine your technique before working on the main garment. I always allocate time to test settings and stitches on leftover fabric.
- Maintain Your Equipment
Regularly clean and oil your sewing machine to ensure smooth operation. I inspect needles and replace them frequently to avoid seam inconsistencies.
By following these tips, you can perfect your Hong Kong seam and achieve professional-quality results in your sewing projects.
Common Mistakes to Avoid
When sewing a Hong Kong seam, avoiding common pitfalls ensures a professional finish. Here are key mistakes to watch out for:

- Improper Fabric Preparation: Failing to properly prepare your fabric can lead to uneven seams. Always wash and press your fabric before stitching to prevent shrinkage and ensure smooth edges.
- Inaccurate Cutting and Marking: Cutting fabric incorrectly or not marking seam lines accurately causes misaligned seams. Use precise measuring tools and double-check your markings before cutting.
- Insufficient Pinning: Not pinning your fabric securely can result in loose seams. Use enough pins to hold layers together firmly, especially along curved edges.
- Inconsistent Stitch Length: Varying stitch lengths weaken the seam’s durability. Maintain a uniform stitch length throughout to ensure strength and a neat appearance.
- Neglecting Topstitching: Skipping topstitching undermines the seam’s reinforcement. Always add topstitches to reinforce high-stress areas and enhance the seam’s finish.
- Poor Edge Binding Application: Incorrectly applying edge binding can cause fraying or bulkiness. Follow precise techniques to ensure the binding lies flat and secures the seam edges smoothly.
- Using Low-Quality Thread: Weak thread compromises the seam’s strength. Invest in high-quality, appropriate thread to ensure durability and a clean finish.
- Inadequate Pressing Techniques: Skipping or improperly pressing seams leads to a less professional look. Press each seam step carefully to set stitches and create crisp lines.
- Misalignment of Twin Seams: Misaligned twin seams create an uneven appearance. Ensure both rows of stitching are parallel and evenly spaced to maintain symmetry.
By avoiding these mistakes, you can achieve flawless Hong Kong seams that enhance the quality and longevity of your garments.
Conclusion
Mastering the Hong Kong seam has truly elevated my sewing projects. It brings a professional touch that I love seeing on my garments. I encourage you to give it a try and experience the difference it makes. With a bit of practice you’ll achieve those sleek and durable finishes that stand out. Happy sewing!