Adding a zipper to your project can seem daunting, but I’ve found it’s easier than you might think. Whether you’re updating a favorite garment or tackling a new sewing project, mastering zipper installation can take your creations to the next level.
With the right tools and a bit of guidance, integrating zippers becomes a seamless part of the process. I’ll walk you through the steps, share some tips, and help you gain confidence in using your sewing machine to install zippers like a seasoned pro.
From choosing the perfect zipper to achieving a smooth finish, each step is manageable when you know how. Let’s dive in and transform your sewing projects by incorporating zippers with ease.
Tools and Materials Needed
Having the right tools and materials ensures a smooth zipper installation process. Below are the essentials you’ll need to get started.
Essential Sewing Tools
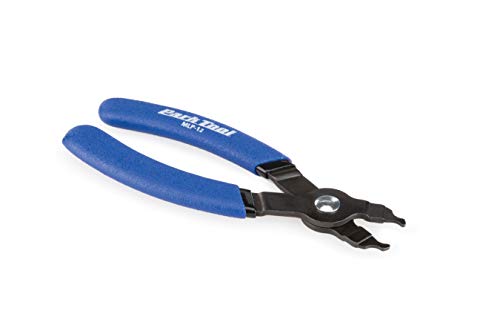
- Sewing Machine: A reliable machine with a zipper foot attachment.
- Zipper Foot: Specialized foot for sewing close to the zipper teeth.
- Needles: Size 70/10 or 80/12 for most zipper types.
- Thread: Polyester or cotton thread matching your fabric.
- Seam Ripper: For correcting any mistakes quickly.
- Pins or Clips: To hold the zipper in place securely.
- Measuring Tape: Accurate measurements for zipper placement.
- Iron and Ironing Board: To press seams and ensure precision.
Choosing the Right Zipper
Selecting the appropriate zipper is crucial for the success of your project. Consider the following factors:
- Length: Measure the opening accurately to ensure the zipper fits perfectly. Common lengths include 9″, 12″, and 24″.
- Type:
- Invisible Zippers: Ideal for garments like dresses and skirts where the zipper should be concealed.
- Metal Zippers: Suitable for jeans, jackets, and heavy fabrics due to their durability.
- Coil Zippers: Versatile option for a variety of projects, available in different sizes.
- Color: Match the zipper color to your fabric for a seamless look or choose a contrasting color for a decorative effect.
- Teeth Size: Ensure the zipper teeth are appropriate for the fabric weight. Larger teeth work better with heavier materials, while smaller teeth suit lighter fabrics.
| Zipper Type | Best For | Common Lengths |
|---|---|---|
| Invisible | Dresses, skirts | 9″, 12″ |
| Metal | Jeans, jackets, heavy fabrics | 12″, 24″ |
| Coil | Versatile projects | 6″, 9″, 12″, 24″ |
Choosing the right zipper not only enhances the functionality of your project but also contributes to its overall aesthetic.


Preparing Your Sewing Machine
Getting your sewing machine ready ensures a smooth zipper installation. Here’s how I set up my machine for the task.
Installing a Zipper Foot
I start by attaching the zipper foot to my sewing machine. First, raise the presser foot lever and remove the existing foot. Align the zipper foot with the shank, squeeze the clips together, and release the lever to secure it. This specialized foot allows precise stitching along the zipper teeth.
Adjusting Machine Settings
Next, I adjust my machine settings for optimal zipper sewing. I set the stitch length to 3 mm for durability and select a straight stitch. I lower the tension slightly to prevent puckering, ensuring the zipper lays flat. Additionally, I use a matching thread to blend seamlessly with the zipper, enhancing the overall look of the project.


Preparing the Fabric
Proper fabric preparation ensures a smooth zipper installation process. I take the time to accurately mark and prepare the fabric before sewing.
Marking Zipper Placement
Accurate placement of the zipper is crucial for functionality and appearance. I follow these steps to mark the zipper placement:
- Measure Length: Determine the exact length needed by measuring from the top to the bottom of the intended area.
- Mark Seam Allowance: Typically, a 5/8-inch seam allowance works well for most zippers.
- Use Fabric Chalk: I use fabric chalk to draw a straight line parallel to the garment edge, aligning it with the seam allowance.
- Double-Check Alignment: Ensuring both sides of the fabric have matching marks prevents misalignment when sewing.
Preparing the Seam
Preparing the seam sets the foundation for attaching the zipper securely. I take the following steps to prepare the seam:
- Press Seams: I press the seam allowances open with an iron to eliminate wrinkles and create a flat surface.
- Trim Excess Fabric: Excess fabric beyond the seam allowance is trimmed to reduce bulk, allowing the zipper to lay smoothly.
- Stabilize Fabric: For delicate fabrics, applying a stabilizer prevents stretching and distortion during sewing.
- Reinforce Edges: I reinforce the edges of the seam with a narrow zigzag stitch to strengthen the area and prevent fraying.
By meticulously marking and preparing the fabric, I ensure that the zipper installation is precise and the final product maintains a professional finish.
Installing the Zipper
Installing the zipper ensures a professional finish. I’ll guide you through each step for a seamless integration.

Sewing the Zipper In
First, I’ll align the zipper with the fabric edge, matching the teeth to the seam allowance. I attach the zipper foot to my sewing machine and sew close to the zipper teeth, keeping stitches consistent. If the fabric puckers, I adjust the tension slightly to achieve an even line. I backstitch at both ends to secure the seam, preventing the zipper from coming undone.
Finishing the Seam
Once the zipper is sewn in, I’ll press the seam open with an iron for a flat finish. I trim any excess threads and reinforce the seam with a zigzag stitch to prevent fraying. If desired, I’ll topstitch along the zipper edge to enhance durability and add a polished look. This completes the installation, ensuring the zipper operates smoothly and the garment maintains its structure.
Troubleshooting Common Issues
Zipper Misalignment
Align the zipper edges with fabric edges; ensure markings match precisely. Verify zipper position before stitching to prevent uneven seams.
Stitch Skipping
Use a new needle appropriate for your fabric type. Adjust machine tension settings if the problem persists, ensuring consistent stitch quality.
Puckered Fabric
Lower the machine tension slightly and increase stitch length to 3 mm. Press seams open after sewing to maintain a smooth finish.
Stuck Zipper
« 10 Genius Ways to Sew a Faced Hem for Clean Edges Like a Pro
Master the Art: How to Sew a Double Needle Hem and Transform Your Projects! »
Check for fabric caught in zipper teeth; remove any obstructions carefully. Adjust thread tension and ensure proper threading of the sewing machine.
Thread Breakage
Use high-quality, appropriate thread for your project. Inspect needle for damage and replace if necessary to maintain continuous stitching.
Uneven Stitching
Clean the sewing machine’s feed dogs and remove any lint build-up. Reattach the zipper foot securely and ensure even fabric feeding during sewing.
Seam Slippage
Backstitch at the beginning and end of seams to secure stitching. Reinforce seams with a zigzag stitch for added durability and strength.
Zipper Pull Issues
Ensure the zipper pull moves smoothly by testing before final sewing. Adjust tension settings if the pull becomes difficult to operate.

Quick Reference Table
| Issue | Possible Cause | Solution |
|---|---|---|
| Zipper Misalignment | Incorrect marking or placement | Realign zipper and double-check markings |
| Stitch Skipping | Dull needle or tension issues | Replace needle and adjust tension settings |
| Puckered Fabric | High tension or short stitches | Lower tension and increase stitch length |
| Stuck Zipper | Fabric obstruction or threading | Clear fabric and rethread machine correctly |
| Thread Breakage | Low-quality thread or needle | Use quality thread and inspect needle |
| Uneven Stitching | Lint build-up or improper foot | Clean machine and secure zipper foot |
| Seam Slippage | Inadequate stitching | Backstitch and reinforce seams |
| Zipper Pull Issues | Tension problems | Adjust machine tension for smooth operation |
Conclusion
Installing zippers has really opened up new possibilities for my sewing projects. Seeing how a simple addition can transform a garment is incredibly satisfying. With the right tools and a bit of practice it’s something anyone can master. I’m excited to keep experimenting and enhancing my creations. Give it a try and enjoy the process of taking your sewing to the next level!