

Are you frustrated with your sewing machine constantly bunching up underneath? Don’t worry, you’re not alone! Many sewers have experienced this issue at some point. In this article, we’ll explore the common reasons behind this problem and provide you with some helpful tips to troubleshoot and fix it. So, if you’re tired of dealing with tangled threads and uneven stitches, keep reading to find out how you can solve the mystery of the dreaded bunching underneath!
Have you ever wondered why your sewing machine seems to have a mind of its own and keeps creating a mess of tangled threads underneath your fabric? Well, wonder no more! In this article, we’ll uncover the main culprits behind this frustrating issue. From incorrect threading to bobbin problems, we’ll delve into the possible causes of your sewing machine’s penchant for bunching up underneath. So, if you’re ready to unravel the mystery and get back to smooth sewing, let’s dive in!
Understanding the Problem
If you’re facing the frustrating issue of your sewing machine constantly bunching up underneath, don’t worry, you’re not alone. Many sewers experience this annoyance, but the good news is that there are solutions to get your machine running smoothly again.
Check Your Threading
One of the most common causes of the bobbin thread bunching up is incorrect threading. So, the first thing you should do is double-check your threading to ensure that everything is in the right place. Start by turning off your machine and raising the needle to its highest position. Then, follow the threading path as indicated in your machine’s manual. Make sure the thread is properly seated in each guide and tension disk.
Inspect the Bobbin


Another culprit for the issue could be an improperly wound or jammed bobbin. To address this, remove the bobbin and inspect it closely. Check for any loose threads or snags that could be causing the bunching. If you find any, rewind the bobbin or replace it altogether. Additionally, make sure the bobbin is inserted correctly with the thread pulling smoothly from the bobbin.
Tension Troubles
Incorrect tension settings can also lead to thread bunching underneath. Take a moment to review the tension settings on your machine. It’s recommended to start with the default tension setting and make slight adjustments as needed. Remember, too much tension can cause the thread to bunch up, while too little tension can result in loose stitches.


Other Potential Causes
Sometimes, the issue may not be related to threading or tension. A dull or damaged needle can cause the thread to catch or loop, resulting in bunching underneath. Make sure to use the appropriate needle for your fabric type and replace it regularly to avoid this problem. Additionally, check for any lint, debris, or tangled threads in the bobbin area, as these can affect the smooth flow of the thread.
By understanding the common causes behind your sewing machine’s tendency to bunch up underneath, you can troubleshoot and fix the issue with ease. Remember to be patient, take your time, and follow the instructions in your machine’s manual. With a little practice and know-how, you’ll be back to enjoying seamless sewing in no time.
Stay tuned for the next section on “Tips and Techniques to Prevent Bunching” to learn some expert tricks to avoid this issue in the future.
Checking the Thread Tension
One of the common culprits behind a sewing machine constantly bunching up underneath is incorrect thread tension. When the tension is off, the top and bottom threads don’t properly lock together, resulting in messy, uneven stitches. But don’t worry, checking and adjusting the thread tension is easier than you might think!

Here are a few steps you can take to troubleshoot and fix the thread tension issue:
- Thread the machine correctly: Before you start adjusting the tension, make sure that you have threaded your machine correctly. Take a moment to double-check that the thread is passing through all the necessary guides and tension disks.
- Test with scrap fabric: Grab a piece of scrap fabric and sew a few lines of stitches. Examine the stitches to determine if the tension is too tight or too loose. If the top threads are pulling the bottom threads too tightly, causing them to bunch up, you need to decrease the tension. On the other hand, if the top threads are looping on the underside of the fabric, loosen the tension.
- Find the tension adjustment dial: Locate the tension adjustment dial on your machine. It is usually located either on the front or top of the machine, labeled with numbers or symbols. Refer to your machine’s manual if you’re unsure about its location.
- Make small adjustments: Start by making small adjustments to the tension dial. Turn it slightly to the left or right and then test the stitches on the scrap fabric again. Keep making adjustments until you achieve balanced, even stitches.
Remember, when adjusting the tension, only adjust one dial at a time. If you make too many changes at once, it can be difficult to determine which adjustment caused the desired result.
By checking and adjusting the thread tension, you can prevent your sewing machine from constantly bunching up underneath. It may take a bit of practice to find the perfect tension for different fabrics and threads, but with a little patience, you’ll be able to achieve beautifully even stitches every time!
Let’s move on to the next troubleshooting technique in our quest to solve the mystery of the sewing machine bunching up underneath.
Examining the Needle
One important factor to consider when troubleshooting the issue of your sewing machine constantly bunching up underneath is the condition of the needle. A dull or damaged needle can often be the culprit behind this frustrating problem. Here’s what you need to know about examining and addressing issues with your needle:
« Lose yourself in a world of sewing machine options: Local stores vs. online platforms, which will you choose?
Discover the Ultimate Easiest Pattern for Sewing Face Masks – Unleash Your Creativity and Protect Yourself in Style »
1. Check for dullness or damage: Take a close look at your needle. Is it bent, worn out, or covered in visible signs of damage? If so, it’s time to replace it with a fresh needle. Even a slightly damaged needle can lead to inconsistent stitching and cause fabric to bunch up underneath.
2. Choose the right needle: Ensure that you’re using the correct needle for your fabric. Different fabrics require different needle types. For example, a sharp needle is perfect for woven fabrics, while a ballpoint needle is more suitable for knits. Using the wrong needle can cause tension issues and result in fabric bunching up.
3. Insert the needle correctly: Make sure the needle is inserted all the way up into the needle clamp. A needle that’s not fully inserted can cause skipped stitches, uneven tension, and, consequently, fabric bunching.
4. Clean the needle area: Fabric fibers, lint, and thread scraps can accumulate around the needle, which can impact its performance. Periodically clean the needle area with a small brush or a needle threader to remove any debris that can interfere with the smooth operation of your machine.
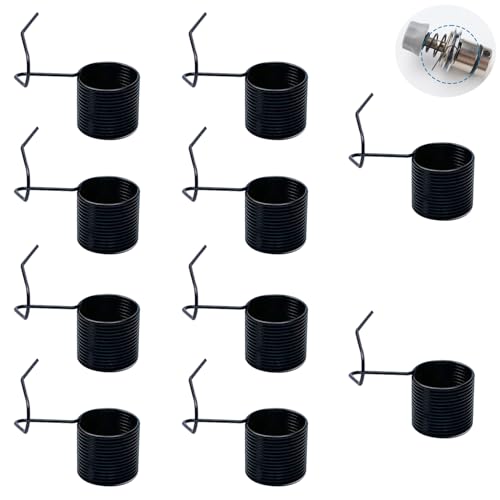
Inspecting the Bobbin
When it comes to troubleshooting your sewing machine, Inspecting the bobbin is an essential step. The bobbin, which holds the lower thread, can often be the culprit behind the constant bunching up of fabric underneath.

Here are some tips to help you inspect the bobbin and address any issues:
1. Remove the bobbin case: Start by removing the bobbin case from your sewing machine. Follow the instructions in your sewing machine manual to safely remove the bobbin case.
2. Check for correct threading: Take a close look at how the thread is wound around the bobbin. Make sure it is threaded correctly through the tension spring and the bobbin case. Incorrect threading can cause tension problems, leading to fabric bunching.
3. Inspect the bobbin for damage: Examine the bobbin for any signs of damage or wear. Look for any rough edges, dents, or scratches that could interfere with the smooth movement of the thread. Damaged bobbins can contribute to uneven stitching and fabric bunching.
4. Clean the bobbin area: Use a soft brush or a cotton swab to remove any lint, dust, or debris from the bobbin case and surrounding area. A buildup of debris can affect the smooth rotation of the bobbin, leading to thread tangles and fabric bunching.

5. Replace or rethread the bobbin: If you find any issues with the bobbin, such as damage or incorrect threading, replace the bobbin with a new one. Make sure to thread the new bobbin correctly through the tension spring and the bobbin case.
Inspecting the bobbin is an important step in troubleshooting your sewing machine. By ensuring correct threading, checking for damage, cleaning the bobbin area, and replacing or rethreading the bobbin if necessary, you can minimize the chances of fabric bunching up underneath.
Cleaning the Machine
Keeping your sewing machine clean is essential to prevent fabric bunching up underneath. Over time, dust, lint, and stray threads can accumulate in various parts of the machine, affecting its performance. By regularly cleaning and maintaining your machine, you can avoid frustrating fabric bunching issues and ensure smooth sewing every time. Here are some tips for cleaning your machine:
1. Start with the exterior:
- Use a soft, lint-free cloth to wipe down the surface of your machine, removing any dust or debris.
- Pay special attention to the areas around the needle plate, feed dogs, and bobbin area, as these tend to collect the most lint.
2. Remove the needle plate:

- Carefully remove the needle plate by following the instructions in your machine’s manual.
- Gently clean the area underneath the needle plate with a small brush or a lint roller to remove any trapped lint or threads.
3. Clean the bobbin area:
- Remove the bobbin and bobbin case from the machine.
- Use a brush or compressed air to clean out any lint or debris that may have accumulated in the bobbin area.
- Inspect the bobbin case for any signs of damage or wear, and replace if necessary.
4. Oil your machine:
- Consult your machine’s manual to determine where and how to apply oil.
- Regularly oiling your machine’s moving parts can help reduce friction and ensure smooth operation.
5. Check the thread paths:
- Inspect the thread paths, including the tension discs and thread guides, for any lint or tangled threads.
- Use a small brush or a needle to gently remove any debris, making sure the thread can move freely.
Conclusion
By following the tips and troubleshooting techniques outlined in this article, you can address the frustrating issue of your sewing machine constantly bunching up underneath. Remember to check for incorrect threading, inspect the bobbin, and review tension settings as these are often the main culprits. Don’t forget to consider other potential causes such as a dull or damaged needle or debris in the bobbin area.
Take the time to check and adjust thread tension by threading the machine correctly, testing with scrap fabric, and making small adjustments to the tension adjustment dial. It’s also important to examine the needle for dullness or damage, choose the right needle for the fabric, insert it correctly, and clean the needle area regularly to prevent fabric bunching up.

Don’t neglect the bobbin either. Inspect it for correct threading, damage, or debris, and clean or replace it as necessary. Lastly, make sure to clean your machine regularly by wiping down the surface, removing the needle plate to clean underneath, cleaning the bobbin area, oiling the machine, and checking the thread paths for any debris.
By following these steps, you’ll be able to minimize fabric bunching and enjoy smooth and hassle-free sewing. Happy stitching!


