I’ve always loved the idea of creating something both beautiful and functional, and sewing a duvet cover is the perfect project for that. There’s just something so satisfying about transforming fabric into a cozy, custom piece that fits your style perfectly. Plus, it’s a great way to refresh your bedroom without spending a fortune.
Whether you’re a sewing pro or just getting started, making a duvet cover can seem a bit intimidating at first. But trust me, with the right tips and tricks, it’s easier than you think—and a lot of fun! Let me walk you through some simple steps and clever hacks to make the process smooth and enjoyable.
Choosing the Right Materials
Selecting the best materials plays a critical role when sewing a duvet cover. Ensuring durability, comfort, and style aligns with your preferences makes the end product more satisfying.
Selecting Fabric Types
I recommend cotton, linen, or a cotton blend for versatility and breathability. Cotton is soft and easy to work with, while linen offers a luxurious feel. Cotton blends provide additional durability, ideal for high-usage covers. Flannel is perfect for colder months, as it’s warm and cozy. For an elegant appearance, sateen or silk can add a polished finish, though they require careful handling during sewing.
When choosing patterns or colors, think about your bedroom’s overall decor. Solid colors create a clean and timeless look, while patterns like florals or geometric shapes add personality. Always pre-wash your fabric to prevent shrinkage later.
Measuring and Cutting Correctly
Accurate measurements ensure a perfect fit. I start by measuring the duvet itself. Add 1 inch on each side for seam allowances and 2 inches for closures like buttons or zippers. For a standard queen-size duvet, for example, the dimensions might be 88×88 inches, so I cut the fabric at 90×90 inches.
I use a rotary cutter and cutting mat for precise cuts and a ruler to ensure straight edges. When working with patterned fabric, aligning the designs when cutting creates a professional appearance. Double-check measurements before cutting to avoid wasting material.
Tools and Equipment Needed
Having the right tools can make sewing a duvet cover efficient and enjoyable. I focus on reliable, beginner-friendly supplies and optional tools that improve precision and ease of use.
Essential Sewing Supplies
- Sewing machine
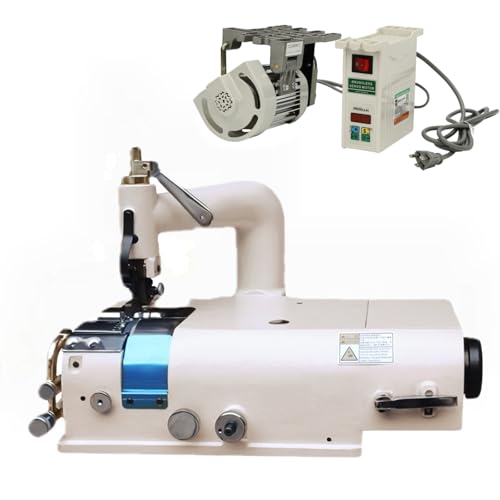
I use a sturdy sewing machine with basic straight and zigzag stitch capabilities. These are sufficient for creating durable seams.
- Fabric scissors or rotary cutter
Fabric scissors offer control, while a rotary cutter with a cutting mat ensures clean, straight edges when cutting large fabric pieces.
- Measuring tape and ruler
A flexible measuring tape works well for measuring the duvet and fabric lengths, while a clear ruler helps with marking straight lines.
- Straight pins or fabric clips
I recommend using straight pins or clips to hold fabric layers securely in place during cutting and sewing.
- Thread and needles
Choose all-purpose thread matching or complementing the fabric color. Standard sewing machine needles in size 90/14 work with most cotton and linen fabrics.
- Fabric marker or chalk
Washable fabric markers or chalk are ideal for marking cutting lines and seam allowances for accuracy.

- Iron and ironing board
Pressing seams with an iron gives the duvet cover a professional, polished look and ensures fabric lays flat during sewing.
Optional but Useful Tools
- Walking foot
This attachment prevents fabric layers from shifting by feeding them evenly, especially when working with slippery or thick materials.
- Seam ripper
Mistakes happen. I always keep a seam ripper nearby for quick fixes without damaging the fabric.
- Point turner
A point turner helps push out sharp corners neatly when creating the edges of the duvet cover.
- Pattern weights
For large fabric pieces, pattern weights can replace pins to hold fabric in place while cutting.
- Edge stitching foot
« How to Sew a Smock Dress for Kids: Easy Step-by-Step Guide for Beginners
How to Sew a Lunch Bag with Insulation: DIY Tips for a Stylish & Functional Food Carrier »
This tool simplifies sewing straight, even topstitching for a polished finish on the duvet cover.
- Overlocker or serger
If available, an overlocker creates clean, finished edges quickly and prevents fabric fraying, particularly for woven materials.
Step-By-Step Guide to Sewing a Duvet Cover
Sewing a duvet cover involves preparation, precision, and creativity. Follow these steps to create a custom cover that’s both functional and stylish.
Preparing the Fabric
Pre-wash the fabric before cutting to prevent shrinkage later. Once the fabric’s dry, iron it to remove wrinkles and ensure accurate cuts. Measure your duvet insert’s dimensions, adding an additional ½ inch on all sides for seam allowances. Lay the fabric flat on a clean surface and use a rotary cutter and ruler to cut two panels—one for the top and another for the underside. If using patterned fabric, ensure alignment for a seamless look.
Sewing the Edges
Start by placing the fabric panels together with the right sides facing inward. Pin or clip the edges to keep them aligned while sewing. Use a straight stitch with a ½-inch seam allowance, sewing around three edges and leaving one side open. For durability, backstitch at the beginning and end of each side. Once sewn, trim excess fabric along the seams and press them open with an iron. For a polished touch, use an overlock stitch or a zigzag stitch to finish raw edges and prevent fraying.

Adding Closures
Choose closures like buttons, snaps, or a zipper to secure the duvet inside the cover. For buttonholes, mark their placement on the open edge, spacing them evenly. Sew the buttonholes first, then attach the buttons to the opposite panel. For a zipper, place it face down along the open edge, pin it in place, and sew on both sides. A zipper foot ensures precision when attaching. Reinforce closures to withstand regular use, and your custom duvet cover is complete.
Design and Decorative Tips
Elevating a duvet cover’s design ensures it complements the bedroom decor and adds a personal touch. I focus on patterns, colors, and thoughtful embellishments to create a one-of-a-kind piece.
Incorporating Patterns and Colors
Using bold, contrasting patterns or subtle, harmonious designs can transform the overall look. I often match the duvet cover’s motif with the room’s theme—botanical prints for a calming space, geometric patterns for modern interiors, or neutral tones for minimalistic styles. Stripes or plaids bring balance, while abstract or watercolor designs feel dynamic. Combining two fabrics, such as a vibrant print for the top panel and a solid color for the underside, creates visual interest and flexibility.
When selecting colors, I use the room’s palette as a guide. If the bedroom has dominant shades, I pick complementary or analogous colors to enhance cohesion. For lighter, airy aesthetics, pastel hues like mint or blush work well. Darker tones, including navy or charcoal, add sophistication.
Adding Embellishments
Personalizing a duvet cover with embellishments adds texture and detail. I like sewing on fabric trims, like lace or piping, along the edges for a decorative border. Tassels or pom-poms at the corners bring a playful element, while buttons covered in contrasting fabric offer visual interest and functionality.

Using embroidery, I incorporate monograms, floral designs, or intricate patterns to create a bespoke feel. For a quilt-like texture, I sometimes stitch tufting patterns across the panels. Remember to keep embellishments functional—avoid adding anything overly bulky that could affect comfort or usability.
Common Mistakes to Avoid
Sewing a duvet cover can bring a sense of accomplishment, but avoiding common mistakes ensures a smoother process and better results. Here are practical tips to handle potential pitfalls.
Troubleshooting Fabric Issues
Working with fabric often introduces challenges that affect the overall outcome. One common issue is shrinking fabric after sewing. I always pre-wash and iron fabric before cutting to eliminate this problem. If the fabric frays excessively, I use a zigzag stitch or serger on raw edges to reinforce them.
Another common mistake is incorrect fabric layout. When cutting patterned fabric, I ensure repeat designs align correctly by laying pieces carefully and pinning them securely. If fabric slips during cutting, a rotary cutter and non-slip ruler provide better control than regular scissors.
Avoiding Uneven Seams
Uneven seams can detract from a polished look. To maintain consistency, I use straight pins or fabric clips to secure pieces before sewing. If seams shift, a walking foot attachment helps keep fabric layers aligned. I also measure seam allowances precisely using guides on my sewing machine or marking them with a chalk pencil.

Rushing through stitching causes crooked lines. I sew at a steady pace, double-checking alignment frequently. If a seam turns out uneven, I use a seam ripper to correct it, ensuring the finished product looks professional.
Conclusion
Sewing a duvet cover is such a rewarding project that combines creativity, functionality, and a personal touch. Whether you’re a beginner or an experienced sewist, taking the time to craft something unique for your space can be incredibly fulfilling.
With the right materials, tools, and a bit of patience, you can create a beautiful duvet cover that perfectly suits your style and needs. Don’t be afraid to experiment with patterns, colors, and embellishments to make it truly yours.
I hope this inspires you to start your own project and enjoy the process as much as the final result. Happy sewing!


