Ever stared at a sewing machine and felt a mix of excitement and intimidation? You’re not alone! Whether you’re looking to hem your favorite pair of jeans or create a custom quilt, mastering a sewing machine opens up a world of creativity and self-sufficiency.
Understanding Your Sewing Machine
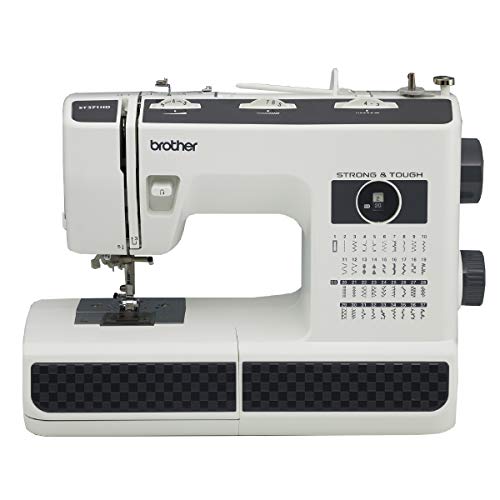
Knowing your sewing machine’s parts and setup is essential for crafting success. You’ll find your work more enjoyable and efficient once you recognize how your machine operates.
Components and Their Functions
- Bobbin: This small spool holds thread inside the machine’s lower part. It works in tandem with the top thread to create stitches.
- Presser Foot: This component holds the fabric steady as you sew. Different feet cater to various stitches and techniques.
- Feed Dogs: These tiny, tooth-like mechanisms move the fabric through the machine while you sew, ensuring even stitching.
- Needle: The needle pierces the fabric, carrying the top thread to form stitches. They come in different sizes and types for various fabrics.
- Spool Pin: This component holds the thread spool. It allows the thread to unwind smoothly as you sew.
- Stitch Selector: This dial or button lets you choose different stitch patterns, like straight, zigzag, or decorative stitches.
- Tension Dial: This dial adjusts the thread tension, ensuring stitches are balanced and even.
- Threading the Machine: Follow the machine’s threading path, usually illustrated with arrows and diagrams on the machine itself. Ensure the thread moves smoothly from the spool pin to the needle.
- Winding the Bobbin: Place the thread on the spool pin and guide it through the bobbin winding mechanism. Fill the bobbin evenly, checking your machine’s manual for specific instructions.
- Inserting the Bobbin: Open the bobbin case and insert the bobbin, ensuring the thread unwinds in the correct direction. Pull the thread through the slot, following any diagrams provided.
- Adjusting Tension: Test a few stitches on a fabric scrap, adjusting the tension dial if necessary. Balanced stitches have the top and bobbin threads interlocking smoothly.
- Selecting Stitches: Use the stitch selector to choose your desired stitch. Test it on a fabric piece to confirm it’s suitable for your project.
- Presser Foot Selection: Attach the appropriate presser foot for your chosen stitch or technique. Different feet are available for tasks like buttonholes, zippers, and quilting.
Understanding these components and setup steps will enhance your sewing experience, making your projects easier and more enjoyable.
Basic Sewing Techniques
Mastering basic sewing techniques elevates your projects and boosts your confidence. You’ll soon see your skills reflected in the quality of your creations.
Threading the Machine
Threading the sewing machine is crucial for smooth and accurate stitching. Start by placing the spool on the spool pin. Guide the thread through the thread guide and follow the path indicated on your machine. Ensure the thread passes through the tension discs and the take-up lever. Insert the thread into the needle from front to back. Correct threading prevents most stitching issues.
Selecting Stitches and Settings
Choosing the right stitches and settings impacts the outcome of your sewing. Modern machines offer various stitches, like straight, zigzag, and decorative. Use the stitch selector to choose your desired stitch. Adjust the stitch length and width based on the fabric and project requirements. For example, use a straight stitch for seams and a zigzag stitch for stretch fabrics. Experiment with different settings to understand their effects on your fabric.


Common Sewing Projects for Beginners
Starting with simple projects helps build confidence. Here are two common beginners’ projects to try.
Hemming Clothes
Hemming clothes can be an easy beginner project. Begin by measuring the required hem length with a ruler or measuring tape. Fold the fabric to the desired length, and press it with an iron to create a crisp fold. Pin the fabric in place. Thread your sewing machine, and select a straight stitch. Align the folded edge under the presser foot, and sew along the inner edge of the fold. Trim any excess thread. Hemming can rescue pants, skirts, and dresses that are too long.
Creating Simple Bags or Purses
Simple bags or purses offer a practical project for beginners. Choose a sturdy fabric like cotton or denim. Cut two rectangles of equal size. Place the fabric pieces together with the right sides facing each other. Pin the edges to hold them in place. Sew along three sides, leaving the top edge open. Turn the bag right side out. Fold the top edge inward, and sew a hem to create a clean edge. Attach straps by sewing them to the inside of the top edge. Simple bags or purses make great gifts or versatile totes for personal use.


Pursue these beginner-friendly projects to hone your sewing skills and create useful items.
Maintenance and Troubleshooting
Regular maintenance keeps your sewing machine running smoothly and extends its lifespan. Address common issues promptly to avoid frustration.
Routine Cleaning and Oiling
Regular cleaning and oiling ensure optimal machine performance. Follow these steps:
- Unplug the Machine: Safety first. Always unplug before cleaning.
- Remove Lint: Use a small brush or vacuum attachment to remove lint from the bobbin case, feed dogs, and other areas prone to buildup.
- Clean the Bobbin Area: Remove the bobbin case and clean it thoroughly. Check for any fabric debris or thread.
- Oil the Machine: Apply sewing machine oil to moving parts following the manufacturer’s guidelines. Avoid using other oils as they might damage the machine.
Refer to your manual for specific cleaning and oiling points as different models have unique requirements.
Solving Common Issues
Address frequent problems quickly with these solutions:

- Skipping Stitches: Rethread the machine, and ensure the needle is inserted correctly. Ensure the needle fits the fabric type.
- Thread Bunching: Check the threading path and the tension settings. Make sure the bobbin is wound evenly and correctly.
- Thread Breaking: Inspect the needle for damage, and replace it if needed. Ensure you’re using the right thread for the fabric and the tension isn’t too tight.
- Fabric Not Feeding: Clean the feed dogs to remove any lint or debris. Ensure the presser foot is down and check if the stitch length is set correctly.
These steps help maintain your machine in optimal condition.
Conclusion
Learning to use a sewing machine can seem daunting at first but with a little practice and patience you’ll soon be creating beautiful projects with ease. Embrace the process and don’t be afraid to make mistakes—they’re part of the learning journey. Remember that regular maintenance and troubleshooting are key to keeping your machine running smoothly. Happy sewing!