Using a walking foot sewing machine can make your sewing projects more manageable and produce better results. However, if you are new to sewing, you may be wondering what a walking foot is and how to use it. In this article, I will guide you through the basics of a walking foot sewing machine, from understanding the walking foot to troubleshooting common issues.
Understanding the Walking Foot
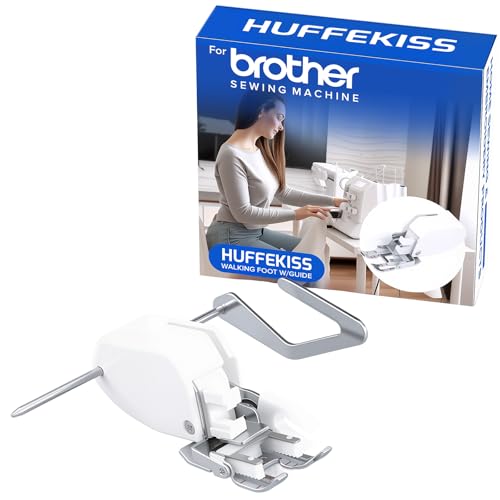
A walking foot is a presser foot that helps feed multiple layers of fabric through the sewing machine evenly. It has an additional set of feed dogs that work in sync with the machine’s feed dogs to prevent shifting or puckering of the fabric. This is especially useful when working with thicker fabrics like leather or quilting layers together.
Preparation and Installation
Before using a walking foot, you need to ensure that your machine is compatible with it. Once you have confirmed compatibility, you can prepare your machine for installation. Installing a walking foot is usually straightforward, but it’s important to follow the manufacturer’s instructions to avoid damaging your machine. Once installed, you can begin sewing with your walking foot, but it’s important to take some time to practice and get comfortable with it.
Key Takeaways
- A walking foot is a presser foot that helps feed multiple layers of fabric through the sewing machine evenly.
- Before using a walking foot, you need to ensure that your machine is compatible with it and follow the manufacturer’s instructions for installation.
- Practice and patience are key to mastering the use of a walking foot sewing machine.
Understanding the Walking Foot
As a sewing enthusiast, I’ve learned that the right tools can make all the difference in the outcome of a project. One tool that has become a staple in my sewing kit is the walking foot. If you’re not familiar with this sewing machine foot, let me introduce you to it.
A walking foot is a specialized sewing machine foot that helps feed multiple layers of fabric through the machine evenly. It has an extra set of feed dogs that work in conjunction with the upper feed dogs of the sewing machine. This makes it easier to sew through thick or slippery fabrics, like leather or silk, without the layers shifting or puckering.
There are different types of walking feet available, including the dual feed foot and the even feed foot. These feet work similarly to the walking foot but may have different features or be compatible with different sewing machine models. It’s essential to check your sewing machine’s compatibility before purchasing a walking foot.
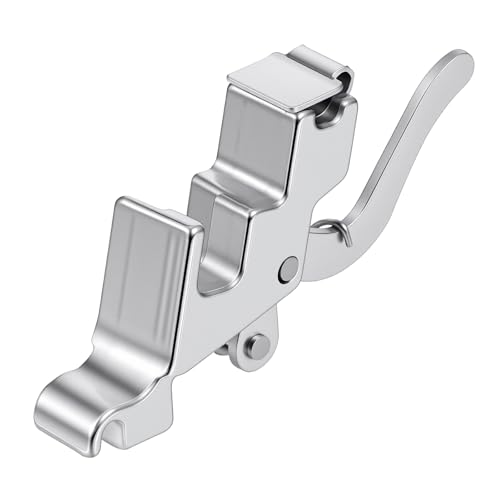
The walking foot can be used on both low shank and high shank sewing machines, but it’s crucial to ensure that you have the correct foot for your machine. Some walking feet may require an adapter to fit your sewing machine properly.
One of the benefits of using a walking foot is that it can help prevent fabric from stretching or shifting during sewing. This is especially helpful when sewing with knit fabrics or when matching plaids or stripes. The walking foot also helps to reduce the amount of pressure on the upper feed dogs, which can prolong the life of your sewing machine.
In summary, the walking foot is an essential tool for any sewing enthusiast. It can help you achieve professional-looking results and make sewing through difficult fabrics a breeze. Whether you’re a beginner or an experienced sewer, I highly recommend adding a walking foot to your sewing kit.
Preparation and Installation
Before using a walking foot on your sewing machine, it’s important to properly prepare and install it. Here are some steps to follow:
Attaching the Walking Foot
- First, turn off your sewing machine and unplug it from the power source.
- Remove the regular presser foot from your sewing machine by loosening the screw on the left side of the presser foot holder with a screwdriver. This will release the presser foot holder.
- Use the handwheel to raise the presser foot holder to its highest position. This will make installing the walking foot easier since it can get tight in there!
- Take the walking foot and align the fork at the back of the foot with the needle bar of your sewing machine. Then, lower the walking foot onto the presser foot holder and make sure it clicks into place.
- Tighten the screw on the left side of the presser foot holder to secure the walking foot in place.
Choosing the Right Needle
When using a walking foot, it’s important to choose the right needle for your project. Here are some things to consider:
- Needle size: Choose a needle size that matches the weight of the fabric you’re using. For example, use a size 80/12 needle for medium-weight fabrics.
- Needle type: Use a needle that’s appropriate for the type of fabric you’re using. For example, use a ballpoint needle for knit fabrics and a sharp needle for woven fabrics.
- Needle position: Make sure the needle is in the correct position before sewing. The walking foot can interfere with the needle, so it’s important to make sure it’s positioned correctly.
By following these steps, you can properly prepare and install a walking foot on your sewing machine, and choose the right needle for your project. With a little practice, you’ll be able to use a walking foot to sew even the trickiest fabrics with ease!
Working with Different Fabrics
When it comes to sewing with a walking foot, different fabrics require different techniques. Here are some tips for working with different fabrics:
Sewing with Slippery Fabrics
Slippery fabrics like silk, satin, and velvet can be challenging to sew with. To prevent your fabric from sliding around, try using a walking foot with a teflon sole. This will help the fabric feed through smoothly without sticking or shifting. You can also try using a spray starch or fabric stabilizer to add some grip to your fabric.
Quilting with Bulky Fabrics
If you’re quilting with bulky fabrics like minky or thick wool, you may need to adjust your walking foot’s pressure. Some walking feet have a pressure adjustment screw that allows you to increase or decrease the amount of pressure applied to your fabric. This can help prevent your fabric from bunching or puckering as you sew.
Handling Stretchy Fabrics
Stretchy fabrics like knits and spandex can be tricky to sew with, but a walking foot can make the process much easier. When sewing with stretchy fabrics, be sure to use a ballpoint needle and stretch stitch to prevent the fabric from stretching out of shape. You can also adjust the pressure on your walking foot to help feed the fabric through evenly.
Working with Special Fabrics
Leather and vinyl require a special walking foot with a roller or wheel on the bottom. This helps the foot glide over the thick, heavy fabric without getting stuck. Minky cloth and other plush fabrics can also benefit from a walking foot with a roller. When sewing with these fabrics, be sure to use a longer stitch length and adjust your walking foot’s pressure to prevent the fabric from bunching or stretching.
By following these tips, you can make sewing with a walking foot a breeze, no matter what kind of fabric you’re working with.

Mastering Sewing Techniques
As a sewist, mastering sewing techniques is essential to creating beautiful and professional-looking sewing projects. With the help of a walking foot, you can take your sewing skills to the next level. Here are some tips and techniques to help you master sewing with a walking foot.
Topstitching and Binding
Topstitching and binding are two techniques that require even stitches and precise control of the fabric. A walking foot helps prevent puckering and ensures even stitches, making it the perfect tool for these techniques. When topstitching, use a straight stitch and adjust the stitch length as needed. When binding a quilt, use a wide decorative stitch to secure the binding in place.
Straight and Zigzag Stitches
A walking foot is also useful for sewing straight and zigzag stitches. When sewing straight stitches, use the edge of the foot as a guide to ensure even stitching. For zigzag stitches, adjust the width and length of the stitch to achieve the desired effect. A walking foot helps prevent the fabric from shifting and ensures even stitches.
Sewing Multiple Layers
Sewing multiple layers of fabric and batting can be challenging, but a walking foot can help. Use pins to hold the layers in place and adjust the pressure on the foot to prevent puckering. When sewing through thick layers, use a longer stitch length and a walking foot to ensure even stitches.
Seam and Pattern Matching
« How to Oil a Sewing Machine: A Beginner’s Guide
Sewing Machines Available on Amazon: Your Ultimate Guide to Finding the Best One for You »
Matching seams and patterns can be tricky, but a walking foot can make it easier. Use the edge of the foot as a guide to match seams and patterns. When sewing plaids, stripes, or checks, use the edge of the foot to ensure even spacing between the lines.
Creating Pleats and Hems
A walking foot is also useful for creating pleats and hems. When creating pleats, use the edge of the foot as a guide to ensure even spacing between the pleats. When hemming, use a straight stitch or a wide decorative stitch to secure the hem in place.
With these tips and techniques, you can master sewing with a walking foot and take your sewing skills to the next level. Remember to adjust the pressure on the foot, use the edge of the foot as a guide, and adjust the stitch length and width as needed. With practice and patience, you can create beautiful and professional-looking sewing projects.
Troubleshooting Common Issues
As with any sewing machine, using a walking foot sewing machine can come with its own set of challenges. Here are some common issues you might encounter, and how to troubleshoot them.
Dealing with Misalignment
One common issue with using a walking foot sewing machine is misalignment. This can happen when your fabric shifts or your seams don’t match up properly. To prevent this, be sure to take your time when sewing and use pins or clips to hold your fabric in place. If you do encounter misalignment, try adjusting the position of your fabric and re-sewing the seam.
Preventing Puckering
Another issue you might encounter is puckering. This can happen when your fabric is not feeding through the machine evenly, causing the stitches to bunch up and create a puckered effect. To prevent this, make sure your fabric is properly aligned and that you are using the correct stitch length and pressure for your project. You may also want to use a walking foot designed specifically for difficult fabrics or thick fabrics.

Adjusting Stitch Length and Pressure
Finally, it’s important to adjust your stitch length and pressure as needed for different projects. For example, when sewing garment seams, you may want to use a shorter stitch length and higher pressure to ensure a strong, durable seam. When sewing curves or delicate fabrics, you may want to use a longer stitch length and lower pressure to prevent puckering or distortion. Be sure to consult your machine’s manual for guidance on adjusting stitch length and pressure, and don’t be afraid to experiment to find what works best for you.
By keeping these essentials in mind and troubleshooting common issues as they arise, you’ll be well on your way to mastering your walking foot sewing machine.
Maintaining Your Walking Foot
As with any tool, proper maintenance can extend the life of your walking foot and ensure that it continues to perform optimally. Here are some tips on how to maintain your walking foot:
Cleaning
Cleaning your walking foot is essential to keep it working smoothly. After each use, I recommend wiping it down with a soft cloth to remove any dust or debris. If there are any stubborn stains or buildup, you can use a mild soap and water solution to clean it. Be sure to dry it thoroughly before storing it away.
Lubrication
Like any machine with moving parts, your walking foot needs to be lubricated regularly. I recommend using a high-quality sewing machine oil to lubricate the moving parts of your walking foot. Be sure to follow the manufacturer’s instructions for oiling your machine, as over-oiling can cause damage.

Storage
When you’re not using your walking foot, it’s important to store it properly. I recommend keeping it in a protective case or bag to prevent dust and debris from accumulating on it. Store it in a cool, dry place, away from direct sunlight or heat sources.
Replacement Parts
Over time, certain parts of your walking foot may wear out and need to be replaced. If you notice any signs of wear or damage, such as a bent or broken needle bar, it’s important to replace the part as soon as possible. Check your walking foot’s user manual for a list of replacement parts and where to purchase them.
By following these simple maintenance tips, you can ensure that your walking foot stays in top working condition for years to come. Remember, proper maintenance is key to getting the most out of any tool or machine, and your walking foot is no exception!
Additional Resources
If you’re looking for more information on how to use a walking foot sewing machine, there are plenty of resources available to help you out.
Manuals
First and foremost, always consult your sewing machine’s manual. It will provide you with detailed instructions on how to attach and use the walking foot, as well as any specific settings you may need to adjust for different fabrics.

Online Marketplaces
If you don’t have a manual or need additional help, consider checking online marketplaces like eBay for user manuals or instructional videos. You may even find helpful tips and tricks from other sewists who have experience using a walking foot.
Janome
If you have a Janome sewing machine, be sure to check out their website for resources on using a walking foot. They offer instructional videos and even have a blog with helpful tips and project ideas.
Sewing Machine Accessories
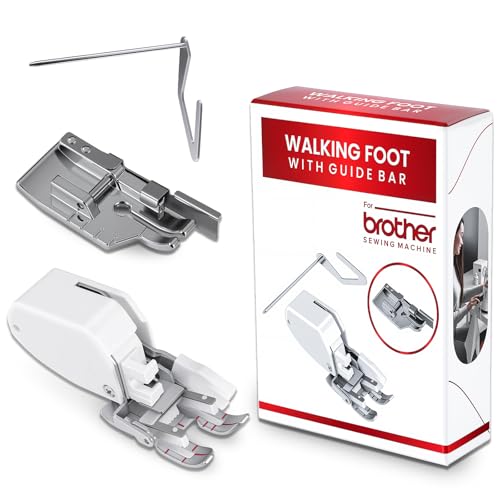
Finally, consider investing in additional sewing machine accessories to make using a walking foot even easier. For example, a quilting guide bar can help you keep your stitches straight and even when quilting with a walking foot.
Overall, there are plenty of resources available to help you master using a walking foot sewing machine. Don’t be afraid to reach out for help or invest in additional accessories to make the process even smoother.
Frequently Asked Questions
What types of projects can be sewn with a walking foot sewing machine?
A walking foot sewing machine is versatile and can be used for a variety of projects. It’s particularly useful for sewing multiple layers of fabric, such as quilts, and for working with slippery or stretchy fabrics. However, it can also be used for sewing garments, bags, and other accessories.

How do you attach a walking foot to a Singer sewing machine?
Attaching a walking foot to a Singer sewing machine is relatively easy. First, make sure your machine is turned off and unplugged. Then, remove the standard presser foot and attach the walking foot in its place. Finally, lower the walking foot lever and you’re ready to sew.
What are common problems when using a walking foot for sewing?
One common problem when using a walking foot is skipped stitches. This can happen if the walking foot is not properly attached or if the tension is not set correctly. Another issue is that the walking foot can be bulky, making it difficult to maneuver around tight corners or curves. Finally, some users may find that the walking foot is noisy or vibrates more than a standard presser foot.
Is it possible to use a walking foot on any sewing machine?
While walking feet are designed to work with most sewing machines, it’s important to make sure you have the correct type for your machine. Some machines require a specific type of walking foot, so be sure to check your machine’s manual or consult with a sewing machine expert before purchasing a walking foot.
How does a walking foot differ from a standard presser foot?
A walking foot has an additional set of feed dogs that work in tandem with the machine’s feed dogs to move the fabric through the machine evenly. This helps to prevent puckering, stretching, or shifting of the fabric during sewing. A standard presser foot only has one set of feed dogs, which can cause the fabric to move unevenly.
What are some tips for using a walking foot on a quilting project?
When using a walking foot for quilting, it’s important to use a longer stitch length to prevent the fabric from puckering or bunching. You should also use a quilting needle and thread, as these are designed to work with multiple layers of fabric. Finally, be sure to practice on scrap fabric before starting your quilting project to get a feel for the walking foot and how it works.


